Setting Up an Effective Mole Trap System in Your Yard

Mole

If you’ve noticed raised tunnels pushing up your lawn or soft, uneven ground under your feet, you might be dealing with moles. These underground diggers can turn a tidy yard into a mess fast. Setting up a good mole trap system is one of the most effective ways to stop the damage before it spreads any further. But it takes more than just dropping a trap in the ground. You need to understand what you’re up against and how to make each trap count.

Getting ahead of the problem with ground mole trapping gives you a better shot at protecting your yard all year long. Summer is usually a busy season when moles are active and feeding heavily, especially after rain has softened the soil. That’s why setting up traps the right way this time of year can make a big difference. If you’re looking to cut down the damage and get your yard looking right again, you’ll want to keep reading.

Understanding Mole Behavior

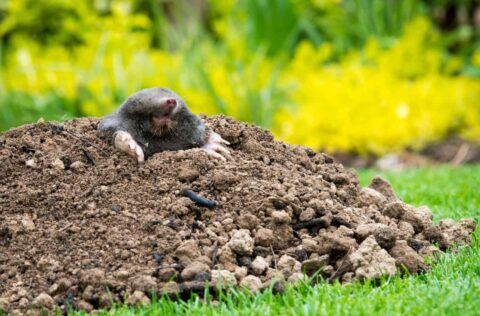
Before you start placing traps, you’ll want to understand what moles do and why. Moles are insectivores, meaning they eat bugs like grubs, worms, and beetles. They don’t eat plants, but the tunnels they make while searching for food can seriously wreck your landscaping. If you see dead grass in lines or mounds of soil called molehills, those are signs you’ve got some underground guests.

Moles create two main types of tunnels. Surface tunnels are just below the grass and are often easier to spot. These are used for hunting. Then there are deeper tunnels that are used for living and nesting. To figure out which tunnels are active, you can gently flatten a section and check back in a day or two. If it’s been pushed up again, you’ve got activity.

Certain times of year bring more movement. In summer, soil tends to stay soft, especially after it rains. That’s when moles move around more to find food. Drier months might slow them down, but as long as insects are around, moles can stick around too.

Some signs that suggest mole activity:

– Raised ridges across your lawn that feel springy when walked on

– Mounds of loose dirt that appear overnight

– Plants starting to droop despite being regularly watered

– Sections of lawn that begin to brown or sink

With this understanding, you’ll be better prepared to pick your traps and place them carefully.

Selecting the Right Mole Traps

There isn’t just one style of mole trap. In fact, you’ve got a few main options, and each works a little differently.

1. Scissor traps: These open and close like scissors, trapping the mole when triggered. They’re powerful and usually set into an active tunnel from above.

2. Choker loop traps: These use a wire loop to catch the mole as it passes through. They need to be placed in a narrow part of the tunnel and must be set gently so they don’t cave in the soil.

3. Harpoon traps: These have spikes that shoot downward when triggered by movement below. You’ll place these over a raised tunnel and wait for the mole to pass underneath.

When choosing the right trap, think about your soil and the kind of tunnels you’re seeing:

– For surface tunnels where the soil is loose, harpoon traps can be a good fit

– For deeper tunnels where you need to dig a little to set the mechanism, choker loops or scissor traps may be better

– If your lawn has rocky or clay-heavy soil, be extra careful with harpoon traps since they rely on pushing spikes downward

Picking the trap that matches your situation will improve the chances of success. One example might be a flat backyard with shallow tunnels where a harpoon trap catches moles within a day or two of placement. In contrast, if your yard has thick, packed soil, you might do better with a scissor trap dug directly into a deeper tunnel.

Proper Placement of Traps

Where you place the trap matters just as much as the trap you choose. If it’s not set in an active tunnel, it’s not going to catch anything. Moles don’t randomly roam throughout your yard. They follow specific feeding paths, and those tunnels can help you figure out where to strike.

The first step is finding an active tunnel. Pick a section of a raised tunnel and carefully press it down with your foot. Mark the area so you can find it again. Come back the next day. If that section has been pushed back up, you’ve got active traffic. That’s the spot to set your trap.

Once you identify the right location, proper trap placement is next:

1. Use a small shovel or spade to remove a piece of sod above the tunnel. Keep that chunk of turf handy to replace later

2. Dig just enough space to fit your trap snugly into the tunnel. Avoid making a big opening, as moles might avoid it

3. Set the trap according to the instructions for that type of device. Test the trigger to make sure it works smoothly

4. Replace the piece of sod on top to help conceal your setup and keep the area dark

5. Mark the spot discreetly with a flag or stick so you remember where you placed it

Check the trap once a day. If it hasn’t gone off after a few days, you might need to try another active tunnel. Moles move fast, but if the trap is in the right spot and working properly, it doesn’t usually take long to see results. Just remember to wear gloves when handling traps, both for safety and to avoid leaving human scent that might scare off moles.

Ensuring Safety and Effectiveness

Setting mole traps isn’t dangerous, but it requires care. Most traps have strong springs or sharp parts that can cause injury if mishandled. Always read instructions carefully and never leave traps where children or pets could reach them. Gloves aren’t just helpful for keeping your scent off the trap, they also keep your hands protected while setting or checking each one.

Once you start catching moles, don’t assume the job is done after one or two. Where there’s one, there’s a good chance others are nearby or passing through. Keep monitoring your lawn and checking for signs of fresh tunnel disturbance.

Here are a few tips to keep your lawn protected after trapping:

– Keep grass trimmed and clear away thick layers of mulch

– Water the lawn evenly so insects like grubs don’t cluster in one damp area

– Avoid over-watering, since soft soil can attract more mole activity

– Keep checking previously active zones every couple of weeks during the summer

Ground mole trapping works better when done consistently instead of just reacting when things get bad. Many people try one or two traps and give up too soon, only to end up with an even bigger problem later.

How Trap Your Moles Can Help

If setting traps and keeping track of mole tunnels feels time-consuming or tricky, that’s when it’s smart to bring in experts. Trap Your Moles offers professional ground mole trapping for homes and businesses, handling every part of the process with care.

Our experience with different soil types and regional mole behavior helps us find problem spots faster. We use time-tested trap methods to make sure the moles are caught quickly and humanely. By letting our team take over, you also avoid the hassle and reduce the risk of injury or damage from handling traps on your own.

We give clear updates, keep track of activity, and help you set up prevention strategies so moles don’t come back. Whether you’ve had ongoing problems or this is your first time dealing with moles, we’re here to help you get control of your yard again.

Say Goodbye to Costly Mole Damage

A solid mole trap system doesn’t need to be complicated. A good understanding of mole habits, picking the right traps for your yard, and setting them effectively all play a big role in stopping damage fast. It takes a bit of patience and effort upfront, but once the trap is in the right place, the difference is noticeable.

Summer is a smart time to act, especially when the soil stays damp and mole tunnels become more active. Keeping up with trap checks and watching for new activity throughout the season helps reduce the chance of bigger issues. Whether it’s your first time dealing with tunnel damage or it’s starting to feel like a familiar scene, the steps you take now can save you a lot of trouble later. Let Trap Your Moles help keep your lawn clear and mole-free.

If you’re ready to take control and protect your yard from mole invasions, explore the benefits of our ground mole trapping services. Trap Your Moles is here to help you keep your property safe and mole-free with proven methods that work fast and last. Reach out to learn how our team can make a difference for your lawn.

How to Spot the Difference Between Mole and Gopher Damage

Lawn Damage

Figuring out who’s responsible for the mysterious destruction in your yard can be challenging, especially when both moles and gophers are in the picture. These critters have a knack for turning your lawn upside down, but they do so in different ways. Knowing how to spot the difference between mole damage and gopher damage is key to effective lawn care. Each animal leaves its own unique trail, and understanding these differences can help you choose the right solution to protect your green space.

By correctly identifying the culprit, you can target the problem more effectively. Without this clarity, you might waste time and energy on solutions that don’t work. We’ll look at the distinctions between moles and gophers, teach you how to spot their damage, and help you understand what those tell-tale signs mean. This way, you can keep your lawn looking its best and avoid unnecessary frustration.

Common Characteristics of Moles and Gophers

Moles and gophers may both disrupt your yard, but they’re quite different in behavior and appearance. Let’s break down what makes them unique and how these differences impact your lawn.

– Physical Traits of Moles:

– Moles have velvety fur, small eyes, and broad, shovel-like front paws perfect for digging.

– They are insectivores, primarily feeding on insects and earthworms.

– Moles create raised ridges or surface tunnels and small volcano-shaped mounds.

– Physical Traits of Gophers:

– Gophers have large cheek pouches, long teeth that show even when their mouths are closed, and clawed forearms for burrowing.

– They are herbivores, munching on roots, grasses, and even some crops or flowers.

– Gophers create larger, fan-shaped mounds and have visible entry points to their tunnels.

Understanding these basic characteristics can make it much easier to see who’s been visiting your lawn. Moles, with their streamlined bodies, are built for stealthy, just-below-the-surface tunneling, while gophers leave more obvious marks as they dig expansive networks.

Knowing these patterns can guide you in deciding your next steps. Whether it’s a mound or a ridge, recognizing these signs means you’re better equipped to address the issue. Keeping these details in mind will aid in choosing the most suitable strategy to maintain a healthy and beautiful lawn, free from unnecessary disturbances.

Signs of Mole Damage

Moles can create a distinctive pattern of disruption in your yard. Their tunneling efforts are often close to the surface, resulting in visible ridges across the lawn. If you notice narrow, raised lines zigzagging through your grass, it’s likely moles at play. These ridges form as they travel just below the surface in search of food.

The impact of moles extends beyond the unsightly ridges. Their underground excavation can cause soil to shift, affecting surrounding plants. You might see wilting or uprooted plants, as their roots are exposed or disturbed. While moles don’t consume vegetation, their tunneling can disrupt the root systems, making plants vulnerable.

Signs of Gopher Damage

Gophers, on the other hand, leave more obvious signs of their presence. Their tunnels are deeper, which can lead to larger, more noticeable mounds of soil on the surface. These mounds are often fan-shaped, and you might find several of them clustered together, marking the entry points to their complex burrowing systems.

Gophers pose a direct threat to vegetation. Unlike moles, they feed on the roots and stems of plants. This can lead to significant plant damage, as entire sections of grass, crops, or garden are eaten away. The destruction tends to be more severe, as gophers may wipe out entire plants by gnawing through their root structures.

How to Deal with Mole and Gopher Infestations

Addressing a mole or gopher problem starts with identifying active tunnels. Look for fresh mounds or active ridges that signify where the critters are currently working. It’s vital to track these signs to determine the extent of their networks and decide on the best intervention strategy.

While it can be tempting to handle the situation on your own, professional services offer targeted and effective solutions. DIY methods can sometimes exacerbate the issue or harm the yard without deterring the pests. Professionals bring the know-how for safely and efficiently managing these subterranean nuisances, ensuring your yard gets restored with minimal hassle.

Ensuring a Healthy Lawn

Once you’ve tackled the immediate problem, keeping your lawn in top shape involves regular monitoring. Frequent checks for new tunnels or mounds will help catch any returning moles or gophers early. The sooner you spot activity, the easier it is to prevent extensive damage.

Preventive measures can also help maintain your lawn’s health. You might consider installing underground barriers or using repellents, ensuring that your yard remains less inviting to these critters. Act quickly if signs of these pests reappear, maintaining a balance between vigilance and enjoyment of your outdoor space. Keeping your lawn beautiful and pest-free is all about staying proactive and informed.

If mole activity is disrupting your lawn’s beauty, it’s time to take action with effective solutions. Let the experts at Trap Your Moles provide you with the peace of mind you deserve. Discover how our extensive experience in professional mole trapping can restore and protect your outdoor space efficiently and safely. Reclaim your yard today and enjoy a mole-free landscape with confidence!

Must-Have Tools for Successful Ground Mole Trapping

mole

Dealing with moles tirelessly burrowing through your garden can be quite the headache. These little creatures can quickly turn a beautifully maintained yard into a network of unsightly mounds and tunnels. While they may be small, they come with big challenges, especially when figuring out how to handle them effectively. Removing ground moles isn’t just about chasing them away – it requires the right set of tools and understanding of their behavior to make a real difference.

The use of proper tools is essential when it comes to trapping moles successfully. Not only do they make the task more straightforward, but they also enhance the chances of dealing with the issue once and for all. Let’s delve into what makes certain tools necessary and how professionals approach the task with finesse.

Understanding Mole Trapping Basics

Before jumping into the types of tools you’ll need, it’s essential to understand the basics of mole trapping. Moles are not pests that can be easily lured away with simple traps. These elusive mammals dig intricate tunnel networks as they search for their primary food source—insects. Understanding this behavior is key to setting up traps effectively.

Mole trapping requires knowing where and how to place traps. Think of it like setting up a treasure hunt; you have to anticipate where the moles are most active. The fundamental principle here is targeting the active tunnels the moles use daily. So, the idea isn’t just to place traps randomly but to recognize and utilize those main highways the moles travel.

Several trap types are commonly used by professionals. Here’s a quick rundown:

– Scissor traps: These are placed directly into the mole tunnel and snap shut when triggered.

– Harpoon traps: As the name suggests, these have spikes that drive downwards into the tunnel.

– Choker loop traps: They tighten around the mole as it passes through.

Each type of trap has its advantage, and knowing which one to use requires some thought. Proper placement and understanding of mole habits make the difference between a successful endeavor and a continuous struggle with more moles showing up.

Must-Have Tools for Mole Trapping

To have the upper hand in mole trapping, certain tools are indispensable. Here’s a list of must-haves for anyone serious about solving their mole problem:

1. Mole Traps: As mentioned earlier, choosing the right kind of trap—be it scissor, harpoon, or choker—is crucial.

2. Gloves: Always use gloves to prevent transferring human scent onto traps, which can deter moles.

3. Trowel or Small Shovel: This aids in uncovering tunnels accurately without collapsing the structure.

4. Marker Flags: Use these to indicate where traps are set, making it easier to check them later.

5. Protective Gear: Protect yourself from potential soil disturbances while working outside.

The quality and durability of these tools matter because they are exposed to soil elements and need to function accurately. Having well-made, sturdy equipment ensures that traps remain effective and that the whole process is as smooth as possible. Each tool serves a specific role in creating an effective trap setup, ensuring that efforts lead to successful outcomes.

Setting the right foundation with these must-have tools paves the way to handling mole problems efficiently. Once equipped, you can focus on the next step—setting these traps properly to increase your chances of success.

Setting Traps Correctly

Proper trap placement is critical when aiming to remove moles from your yard effectively. The process might seem daunting at first, but breaking it down into steps makes it manageable. Start by identifying the active tunnels. These are the ones moles use regularly. A small trick is to collapse sections of a tunnel and check the next day to see if they’ve been repaired. A restored tunnel signals activity, marking a good spot for trap placement.

Once you’ve chosen a location, follow these steps to set traps correctly:

1. Dig a small hole over the active tunnel with a trowel to expose the tunnel path.

2. Insert the chosen trap, ensuring it aligns perfectly with the tunnel.

3. Cover the hole lightly with loose soil, avoiding compacting the dirt over the trap.

4. Mark the site with a flag to easily find it later.

Common missteps include failing to cover traps adequately and placing traps in inactive tunnels. These errors reduce success rates. To increase effectiveness, always handle traps with gloves to avoid leaving human scent, which can repel moles. Revisit trap sites regularly and reset them if needed.

Safety Precautions for Mole Trapping

While handling traps isn’t complex, safety should always be a top priority. Traps pose risks to pets, children, and other non-target wildlife if not handled cautiously. To ensure safety, follow these guidelines:

– Keep children and pets away from trap areas by explaining the process or using temporary fencing.

– Use gloves when setting and checking traps, as this prevents both the transfer of human scent and potential harm from the trap mechanisms.

– Ensure traps are not placed in areas frequented by other wildlife you wish to avoid, such as birds and squirrels.

For environmentally friendly practices, use traps designed to minimize harm to non-target species. Steer away from chemical-based solutions which can affect the soil and non-target wildlife. When the trapping process is finished, remove traps promptly to leave no residual hazards.

Enjoying a Mole-Free Property

With the right approach and tools, achieving a yard free from moles is feasible. This endeavor provides peace of mind and returns your garden to its appearance without unsightly molehills and tunnels. Consistency in checking and resetting traps helps maintain the progress made and deters new infestations from taking hold.

A well-maintained garden is a reward in itself. Knowing you’ve taken the necessary steps to protect and nurture your outdoor space brings satisfaction and convenience. By handling mole control the right way, you secure a welcoming environment that enhances your property’s value and enjoyment.

Ready to tackle mole issues for good? Learn how our tailored approach to the removal of ground moles can restore your lawn’s natural beauty and prevent further damage. Trap Your Moles is here to help you enjoy your yard without the hassle of tunneling pests.

Dealing with Moles in the Summer: Special Considerations

Mole

Maintaining a picture-perfect lawn during the summer can be tricky, especially when moles decide to make your yard their home. These little diggers can create chaos, leaving unwanted tunnels and heaps of dirt everywhere. As temperatures rise, moles become more active, searching for food and shelter under your well-kept grass. Their presence can turn your beautiful green space into a network of ridges and mounds that are not only unsightly but also harmful to the lawn’s health. Dealing with these pesky creatures during the hottest months requires some know-how and a few strategic steps.

Addressing mole issues in the summer is important to ensure your lawn stays healthy and lush. Moles can undermine plant roots, disturb soil balance, and promote weed growth. By understanding how to manage their activity, you can prevent such damage and keep your grass looking its best. Investing a bit of time and care into mole control can make all the difference between a yard full of bumps and a smooth expanse ready for sunbathing or backyard games.

Summer Mole Behavior

When summer arrives, moles often exhibit heightened activity due to the warmth and moisture in the ground. You might notice new tunnels appearing more frequently as these creatures search more actively for food like earthworms and insects, which become plentiful during this season. The increased abundance of their favorite meals draws them closer to the surface, where they can cause visible and hidden disruptions.

Several factors contribute to why moles are more prominent during summer:

1. Increased Food Supply: Warmer weather brings an influx of insects and worms, making your yard a tempting feast for moles.

2. Moist Soil: Summer rains soften the ground, making it easier for moles to dig and expand their underground networks.

3. Habitual Behavior: Moles tend to establish their territories where the food is, and summer’s abundance ensures they’re not moving anytime soon.

Given these behavioral patterns, it’s wise to keep an eye out for early signs of mole activity as they settle in for the summer. By understanding how their habits adapt with the seasons, you can take steps to address their presence before serious damage occurs. Implementing timely mole control measures can help maintain your yard’s appearance and function throughout the sunny months.

Identifying Mole Damage in Summer

Spotting mole damage during summer isn’t always straightforward, but there are telltale signs to keep an eye out for. Moles tend to create unsightly raised ridges and mounds of dirt, known as molehills, as they burrow underground. These features disrupt the smoothness of your lawn and can be a nightmare for anyone trying to maintain an even, healthy yard.

In addition to the physical alterations on the surface, underground tunneling can have a negative impact on plant roots, weakening grass and causing patches of brown. Unlike other seasons, summer can accelerate this damage due to frequent lawn use and increased soil activity from insects. This season-specific damage means you need to act swiftly to identify and combat mole activity.

To distinguish between seasonal and year-round mole activity, consider how the changes affect plant growth. During summer, disrupted roots can cause rapid wilting, particularly in high temperatures. Paying attention to these symptoms can help identify the need for immediate intervention.

Effective Summer Trapping Techniques

Capturing moles requires an understanding of effective trapping methods, especially in summer when their activity peaks. Here are simple steps to successfully trap these critters without damaging your lawn further:

1. Select the Right Trap: Choose a trap designed specifically for moles. Harpoon and scissor traps are popular choices because they target moles directly in their tunnels.

2. Locate Active Tunnels: Flatten a small section of a suspected tunnel. If it raises again by the next day, it’s active. This ensures you’re placing the trap where moles are currently passing through.

3. Set and Monitor: Set the trap in the active tunnel following the manufacturer’s instructions. Regularly check it to ensure a swift capture and to reset as needed.

Avoid setting traps randomly. Placement accuracy increases success rates and lessens the disturbance to your lawn. Focus on existing activity, rather than potential areas of mole presence, for optimal results.

Enjoying a Mole-Free Lawn This Summer

Facing summer mole problems may seem challenging, but with the right approach, you can reclaim your lawn in no time. By understanding mole behavior and implementing effective trapping and prevention strategies, your yard can once again become a smooth and enjoyable space for outdoor activities.

Taking proactive measures allows you to focus on enjoying the summer weather without worrying about mole-related disruptions. With a little attention and strategy, you can transform your yard into a mole-free paradise, ready for summer picnics, games, and relaxation.

Say goodbye to mole problems and embrace a healthier lawn with expert help. Discover effective solutions for the removal of ground moles. Trap Your Moles offers reliable services tailored to your needs, ensuring a smooth and enjoyable outdoor space this summer. Whether you’re tackling minor disruptions or extensive damage, we’re here to help keep your yard beautiful all season long.