Repairing Lawn Areas Damaged by Mole Activity

Mole Damage

A torn-up lawn can leave any homeowner frustrated, especially after discovering moles have been tunneling underneath the grass. Mole activity can mess with your yard’s appearance and disrupt soil structure, making it hard for your grass and plants to grow properly. While removing the moles is the first step, the lawn doesn’t magically fix itself once they’re gone. You’ll need to get your lawn back in shape to fully recover from the damage.

Fall is the perfect time for these kinds of lawn repairs. With cooler temperatures and more consistent moisture, grass has a better shot at taking root and bouncing back before winter sets in. If you’re seeing uneven ground, patches of dead grass, or tunnels caving in, it’s time to take action. Whether you enjoy handling yard work yourself or prefer to hand it off, understanding the basics of mole damage repair can help you plan the right approach.

Identifying Mole Damage

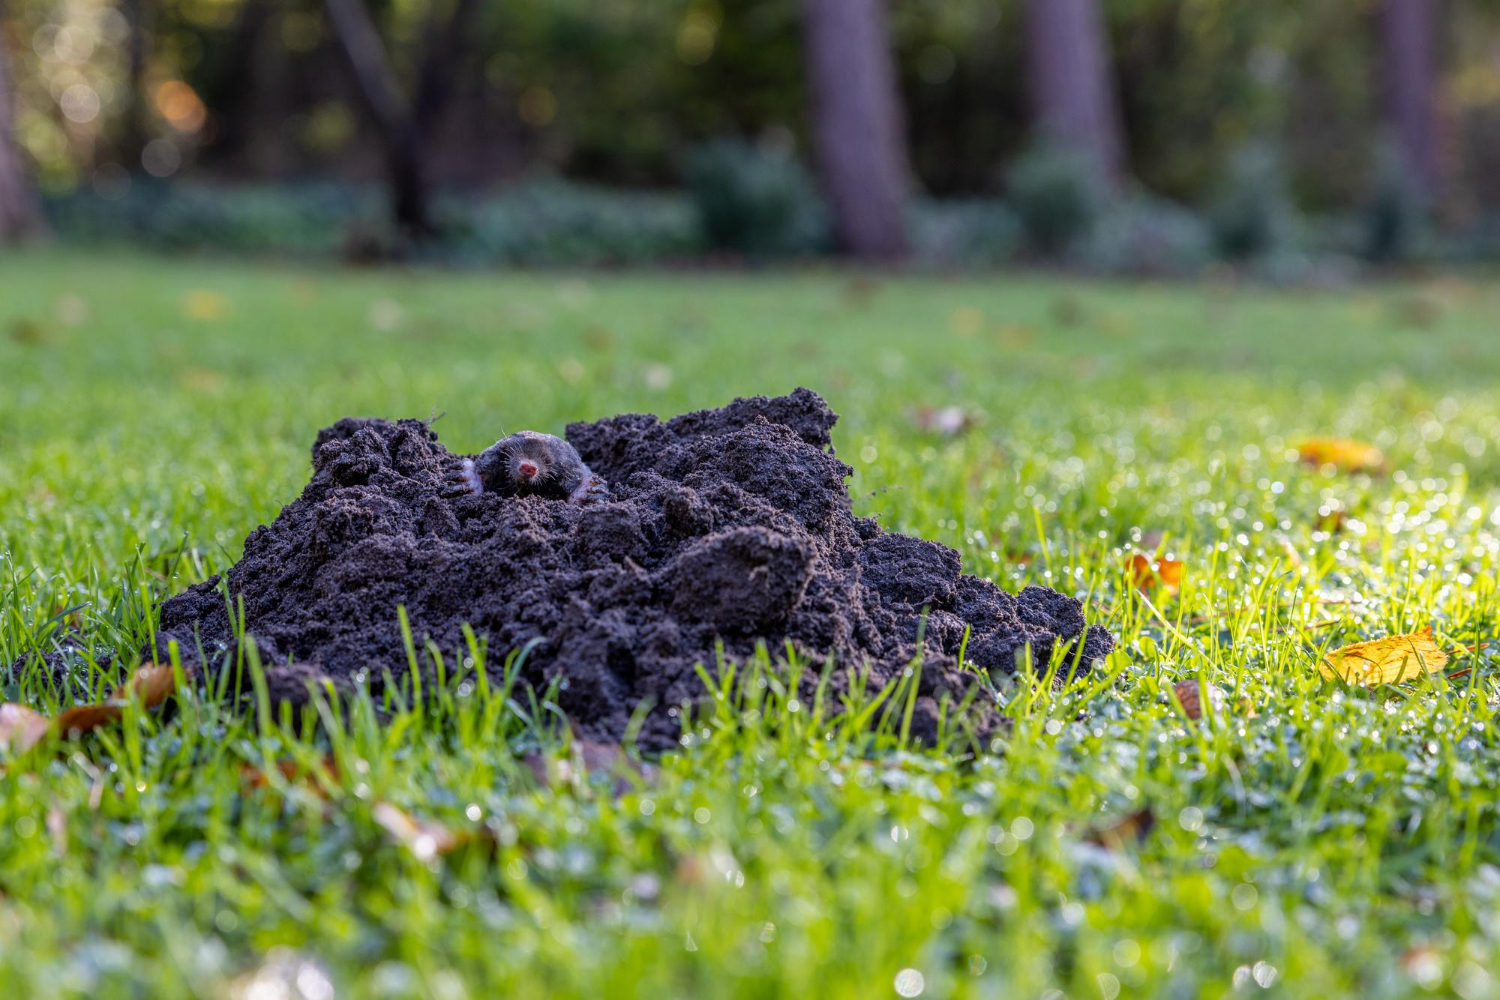
Mole damage looks different from other lawn issues. If you know what to look for, you can quickly tell whether moles have been at work or if it’s something else like grubs or dry conditions. The most obvious signs are raised ridges that run across your lawn or small volcano-shaped mounds made of pushed-up soil. These are created as moles tunnel underground while looking for food.

Here are a few things that usually signal mole activity:

– Winding ridges or surface tunnels that make the ground feel spongy underfoot

– Lumps or soil piles that appear overnight, often near tunnel entrances

– Dead patches of grass caused by roots being disturbed from below

– Uneven areas of lawn that sink or collapse when stepped on

Unlike insects that chew on roots directly, moles cause damage by digging. They’re mostly after worms and bugs, not your grass. But while they don’t eat plants, their constant burrowing can still kill grass and weaken root systems, leaving your lawn looking rough. If you catch these signs early, it gives you a better shot at reversing the damage before it spreads.

Assessing the Extent of Damage

Once you know moles have torn up your yard, the next step is figuring out how far the damage goes. This will help you decide whether you’re dealing with a few surface tunnels or more widespread destruction. Walk the yard slowly and pay attention to texture and softness. Step carefully along damaged areas and feel for sunken spots or unstable ground that might collapse under pressure. That’s usually a sign that tunnels are just below the surface.

Here’s a simple way to assess the scale of the damage:

1. Start by walking the entire yard and making a map or rough sketch

2. Circle all raised tunnels and visible soil mounds

3. Mark any patches of grass that look stressed or dead. These are often linked to underground paths

4. Use your foot to press gently along ridges. If it sinks or caves in too easily, the tunnel likely needs to be filled in

5. Check for damage around flowerbeds or near walkways where collapsing soil can become a hazard

Taking the time to evaluate the full area helps you avoid wasting time and effort on areas that aren’t affected. Once you understand where the worst damage is, you can move on to getting those specific spots patched up and growing again.

Step-By-Step Lawn Repair Process

After taking care of the moles and figuring out where the damage is, it’s time to get your lawn looking and feeling right again. Lawn repair might sound like a big job, but breaking it down into clear steps makes it manageable. Whether you’re fixing a couple of small patches or a large network of tunnels, the same basic process applies.

1. Collapse and fill tunnels

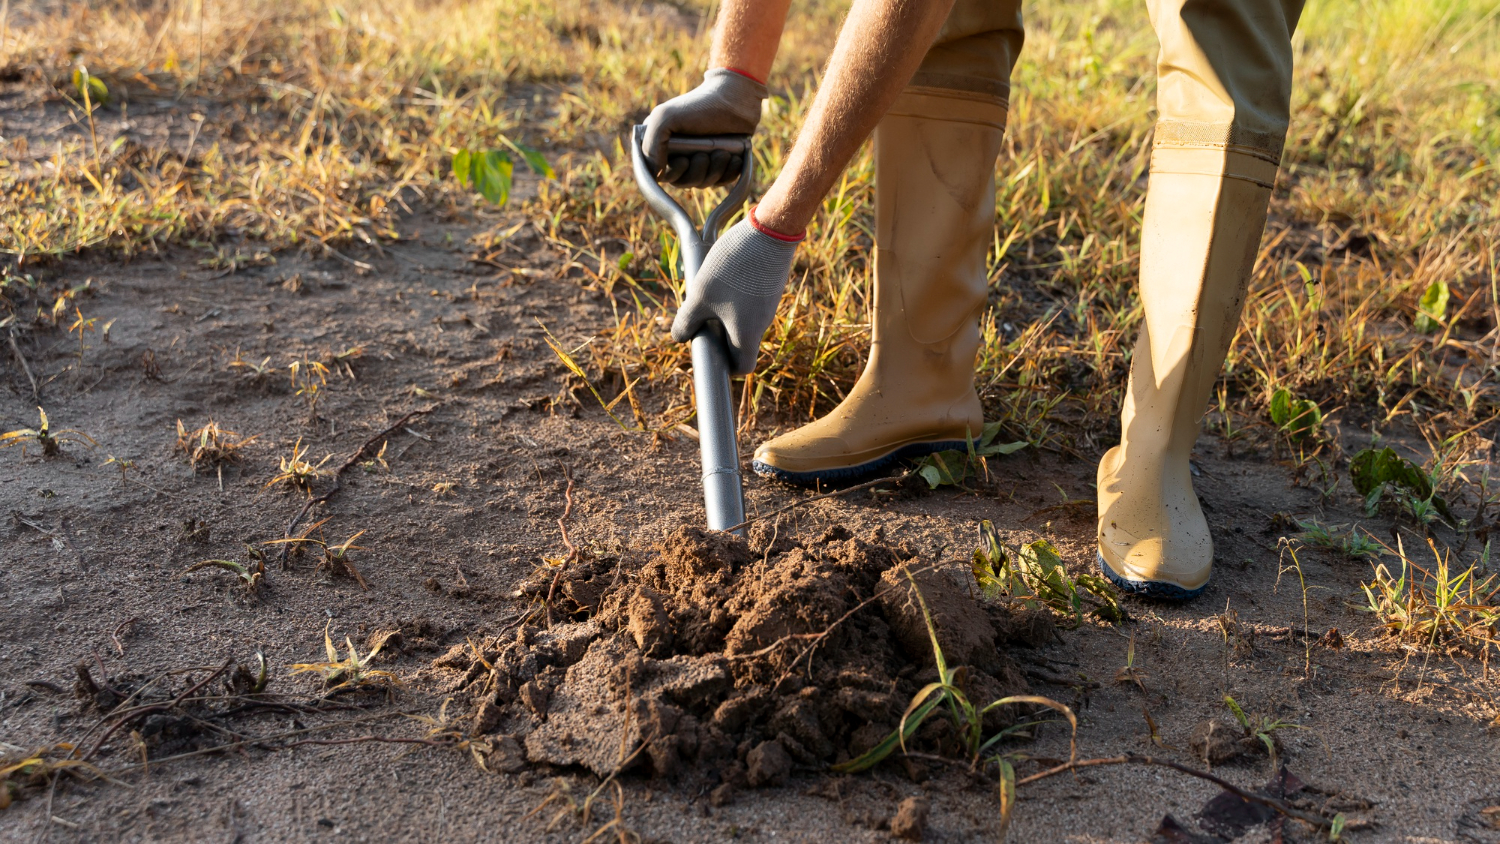
Use a shovel or the back of a rake to flatten out raised ridges. Step on them carefully to pack down the soil. Then, fill in any sunken spots or larger holes with clean topsoil. This helps prevent tripping hazards and settles the surface before reseeding or laying sod.

2. Loosen compacted soil

Tunneling can disrupt the natural structure of your soil. Before planting anything new, loosen up compacted areas using a garden fork or hand tiller. This gives roots a chance to grow deeper and improves water flow.

3. Add seed or sod

For small patches, grass seed works just fine. Choose seed that matches the rest of your lawn, sprinkle it generously over the repaired spots, and press it into the soil by walking over it or using a tamper. For bigger sections or immediate coverage, use fresh sod. Line it up edge to edge and press it in snug so it can take root.

4. Water gently but often

Keep the area consistently moist for about two weeks. Water in short bursts once or twice a day, just enough to keep the surface from drying out. Don’t drown it, just keep it damp. Once grass starts growing, you can water less often but more deeply.

5. Use soil treatments if needed

If the ground seems tired or lifeless, add an organic lawn booster like compost or a mild fertilizer. Fall is a good time for this, as it supports root growth before winter sets in.

Doing these steps carefully helps your lawn recover faster. Patience pays off, especially when you start seeing green patches take hold and cover the damaged areas.

Preventing Future Mole Activity

Once your yard is patched up, keeping moles from returning should be high on the list. Just dealing with the damage without preventing future problems can turn this into a cycle.

Start by making your lawn less inviting to moles. They’re attracted to loose, moist soil that’s rich in insects. If your yard holds water or stays damp too long, improve the drainage with aeration or soil amendment. Moles don’t like dry or compacted areas, so well-maintained grass is often less appealing to them.

Here are some easy ways to lower your chances of mole issues in the future:

– Don’t overwater. Keep irrigation on a regular schedule and avoid waterlogging the soil

– Keep your lawn mowed, raked, and free of debris so insects have fewer places to hide

– Aerate your lawn once or twice a year to keep it from becoming too soft or spongey

– Watch for new tunnels and react quickly to any signs of digging

It helps to check in on your yard every few days during peak mole seasons like spring and fall. Early signs are easier to manage than a full-blown network of tunnels.

Get Your Lawn Back On Track

Repairing mole-damaged areas may take some effort, but it puts you back in control of your outdoor space. Once you’ve fixed the visible damage and taken steps to discourage future tunneling, your lawn can bounce back stronger than before. Recovery won’t happen overnight, but regular care and attention make all the difference.

Fall is a great window for this work, especially with mild weather helping new grass establish strong roots. Whether you’re dealing with a few ridges or large bare spots, the best time to start is right after mole activity ends. With the right approach and follow-through, you can put the mess behind you and enjoy a yard that’s clean, even, and healthy again.

Repairing a lawn can be a fulfilling project for homeowners looking to restore their outdoor space to its former glory. If you’re feeling overwhelmed by the prospect of tackling mole damage repair, let Trap Your Moles help you reclaim your yard. Our team offers comprehensive services to address all your mole-related issues and keep your lawn thriving. Explore our solutions and take the first step toward a healthy and beautiful lawn.

Where to Place Traps for Maximum Mole Catching Success

ground mole

Moles may be small, but their presence can create some big problems in your yard. Tunnels crisscrossing under the grass, mounds of soil scattered across your lawn, and roots left exposed can be enough to frustrate any homeowner. These underground pests can destroy the look and feel of your outdoor space before you even realize what’s happening. Fixing the damage after a mole has made itself at home is no easy task, and placing traps without a plan might leave you with more work and no results.

That’s why careful trap placement really matters. It’s not just about setting traps anywhere you see a mound. Success comes from knowing where moles move, how they build their tunnels, and which spots give you the best shot at a quick and effective catch. This article covers helpful strategies to choose the best locations for ground mole traps so you can protect your yard with confidence.

Understanding Mole Tunnels

Before you place a trap, it helps to know how mole tunnels work. Moles use two main types of tunnels: surface runways and deeper, long-term routes. Each one plays a different role in the mole’s daily life, so knowing which is which helps you figure out where to target.

Surface runways are right beneath the grass. You’ll usually see them as raised lines stretching across the yard. Moles make them while foraging for food like worms and bugs. These tunnels might only be used once, but they might get rebuilt in areas where there’s plenty to eat.

Deeper tunnels are built farther underground. They’re harder to recognize because they don’t disturb the top layer of soil much. Moles use them all year to travel across their territory and to nest or store food.

Here’s how you can spot and test for active tunnels:

  • Step gently on part of the surface tunnel to flatten it. Check 24 hours later. If it’s raised again, it’s probably active.
  • Look for straight lines with little branching. Moles like to travel along these paths repeatedly.
  • Fresh dirt mounds nearby often signal recent digging.

Knowing where moles are going rather than where they’ve been gives you a big advantage when setting traps. You want to set your trap where the mole is likely to travel again, not just anywhere you notice loose soil.

Best Locations For Traps

It’s common to think molehills are the best spots for traps, but that’s not usually the case. Molehills are often created when dirt is pushed up from deeper tunnels, not from areas where the mole hangs out regularly. The most effective traps go where moles move through often, which is usually inside active tunnels.

Use these tips to pick out the best trap locations:

  1. Choose straight sections of tunnels. These are more likely to be reused than curving or branching ones.
  2. Avoid spots with tree roots, large rocks, or really muddy areas. These obstacles can trigger the trap early or mess up its positioning.
  3. Spread out your traps if mole activity seems heavy. Covering more ground boosts your chance of success.
  4. Mark your locations with small flags or stakes so you can come back easily for checks or resets.

Once you pick your spots, clear away extra soil or grass and make sure the trap blends with the tunnel. It should feel like a normal section of tunnel to the mole. A tightly set, camouflaged trap is more likely to get results.

It’s all about giving your trap the best shot by finding the right tunnel, creating the right setup, and getting rid of anything that might block the mole’s path. A few extra minutes of prep on trap day are well worth the payoff.

Techniques For Setting Traps

After choosing the right tunnel and readying the setup, it’s time to install the trap. There are several choices out there, but scissor traps and harpoon traps are the ones most often used. They work in slightly different ways and need different setups.

Here’s how to set a scissor trap:

  1. Dig carefully into the tunnel until both ends are visible and open.
  2. Clear out loose soil so the tunnel shape stays true, and make sure it’s not collapsed.
  3. Place the trap so the jaws line up directly with the tunnel’s direction.
  4. Press it into place. It needs to be snug so it doesn’t shift or feel out of place.
  5. Cover the hole with a board, bucket, or similar item to block out air and light.

Setting a harpoon trap goes a bit differently:

  1. Look for an active surface tunnel.
  2. Place the trap directly on top, without digging down or disturbing the runway.
  3. Press it in gently to anchor it, but don’t collapse the tunnel underneath.
  4. Arm the mechanism and wait. Watch for movement or signs that the trap has been triggered.

No matter what trap you use, check it daily. If there’s no sign of action after two or three days, move it to a new spot. Also, wear gloves when handling traps. Moles are very sensitive to human scent, and your smell might keep them away.

Setting the trap correctly is just as important as choosing the right location. A well-placed trap will still fail if it’s installed the wrong way. Take the time to follow the instructions, keep safety in mind, and be patient. Moles can be tricky, but careful work tends to pay off.

Seasonal Considerations For Mole Trapping

Mole activity isn’t constant all year. The season can have a big effect on how active they are and how successful your trapping efforts will be. Knowing the timing helps you plan smarter.

Fall tends to be a pretty good time to trap moles. The ground is soft enough to work with, there’s usually more moisture, and moles are busy feeding and getting ready for winter. That makes it easier to find fresh tunnels and place traps.

Some tips for fall trapping:

  • Focus on tunnels along the edges of woods or near gardens. These areas are often mole hotspots during the fall.
  • Look after a rain. Raised runs or new mounds mean fresh movement.
  • Avoid hard clay soil if it’s dry. Moles might be deeper underground when the surface starts to harden.

In winter, shallow activity slows down because of cold temps. Moles dig deeper to avoid the frost. Trapping may not work well until spring arrives and warming soil brings them back up. Spring offers another good window because the soil is thawed, moist, and full of bugs near the surface. Summer trapping can be tougher. The ground might be dry and packed down, making tunnels harder to find and use.

Weather and soil conditions change each year, so keep an eye on your yard. Some areas may stay active longer than others. If you change your strategy depending on the time of year, you’ll have a better shot at catching those unwanted diggers.

Keep Your Lawn Mole-Free with Trap Your Moles

Getting rid of moles doesn’t have to be hard guesswork. The trick is knowing how they move, what their tunnels look like, and how best to set your traps. By learning the signs, setting your traps the right way, and paying attention to seasons, your odds of catching moles go way up.

Mole problems may feel endless, especially when you work hard but see no results. But each time you check a trap or follow tunnel paths, you get closer to figuring out the pattern. Over time, those efforts add up. You begin to see where they travel most, how fresh the soil looks, and which traps actually work in your yard.

Don’t give up after one or two tries. Adjust your plan based on what you see, and stay consistent. It’s that mix of focus, patience, and action that makes your trap placement work. And when in doubt, Trap Your Moles is here to help you take care of the problem the right way.

Struggling with stubborn moles tearing up your yard? Let Trap Your Moles take the hassle out of your hands. Our experience with setting up ground mole traps keeps your lawn looking clean and undisturbed. Reach out today and take back your outdoor space with confidence.

Protecting Your Fall Garden from Mole Damage

Mole Damage

Fall gardens can be full of promise. Cooler temps and rich soil conditions make it an ideal season for growing root vegetables, leafy greens, and late-blooming flowers. But just when you’re settling in to enjoy it, mole activity can quietly take hold. This is the time when those small underground pests get more active, and their behavior can lead to noticeable, and frustrating, damage. Raised tunnels, collapsed roots, and unsightly dirt mounds might show up overnight, threatening all the time and effort you’ve put into your garden.

While summer’s intense heat tends to keep moles deeper underground, fall’s softer soil and cooler air draw them closer to the surface. That means they’re more likely to wander into garden beds while searching for food. Understanding how moles behave this time of year can help you spot early signs and take the right steps before things get out of hand. Knowing what to look for and how to respond can make the difference between a garden that thrives through the season and one that’s left in disarray.

Trap Your Moles focuses on helping property owners through this season with expert yard mole control services that are timely and effective.

Recognizing Mole Activity In Your Fall Garden

Start by observing any changes in the layout or texture of your soil. Moles don’t actually eat plants but their tunneling habits can seriously mess up growing areas. When roots get pushed up or disrupted under the soil, plants can wither or even die. You might also see molehills forming—those familiar, cone-shaped piles of loose dirt—across the lawn or around the garden. These result from deep tunnel digging as moles work through the soil in search of meals like earthworms and bugs.

Here are a few signs that suggest moles might be moving in:

– Soft or spongy ground in your garden beds

– Long, raised ridges that form narrow paths in your lawn

– Fresh dirt mounds with no visible holes

– Plants wilting even though they’ve been well-watered

– Areas where the grass looks sunken or uneven

Most of these signs point to underground tunneling that disturbs soil structure. Catching this early can make a big difference. If you ignore the problem, moles can cause widespread damage that’s tough to reverse. For instance, a bed of spinach can become uprooted from just one tunnel running underneath, stressing those plants and cutting off access to nutrients and water.

Fall gardens face higher risk than other seasons because the soil tends to be loose after harvest or planting. This makes it easier for moles to dig and harder for roots to stay stable. The more familiar you are with what their presence looks like, the faster you can act on it.

Effective Yard Mole Control Methods

Once you’ve seen the signs of moles, the next step is figuring out how to stop them. Moles don’t move in straight lines or stick to regular schedules, so catching them takes the right method and timing. Traps remain one of the most dependable solutions, especially during fall when the soil is soft and mole activity is higher.

Trap placement is key. Your best bet is to place traps on active tunnels. These tunnels usually feel firm and bounce back when stepped on, as opposed to older, unused ones that stay flattened. Wearing clean gloves when setting traps can help avoid leaving a scent that might warn the moles away.

You might be tempted to fix things on your own, but controlling moles takes more than tossing out a trap or two. Their patterns shift all the time. Mole control often takes consistent effort, experience, and patience. Since fall is a narrow window before winter, acting quickly matters. The longer they stay, the more they can ruin your garden beds and yard.

If you’re finding new tunnels after trying basic setups, it might be time to involve professionals. A trained mole control service understands tunnel behavior and how to break up travel paths quickly. This leads to a better outcome with less trial and error. With a more targeted and skillful approach, you stand a better chance of protecting what you’ve planted and avoiding repeated frustration.

Damage Prevention Techniques For Fall Gardens

Stopping mole damage before it starts is far easier than trying to fix soil and plant stress after the fact. No method can guarantee moles won’t come around, but you can reduce how welcome your garden seems to underground pests.

Try these steps to make your garden less appealing to moles:

– Clean up ripe or rotting produce that might draw in bugs, a mole’s main food source

– Limit watering to avoid making soil overly moist, which can attract earthworms and increase mole interest

– Use raised beds to create a physical barrier that makes tunneling more difficult below the surface

– Plant densely or use species with strong roots to slow down tunneling under garden beds

– Install underground mesh or wire to block digging under specific areas like vegetable plots

Some people also use castor oil-based sprays or other natural repellents for short-term effects. These can be useful in combination with other steps but shouldn’t be viewed as primary solutions. The best prevention still relies on reducing food sources and having a reliable trapping method available.

Tips To Keep Your Garden Strong Through Fall

Beyond mole prevention, general garden health will help your plants stay strong and balanced through the season. Fall brings cooler weather and reduced daylight, so every small step makes a difference.

Start by choosing crops and flowers suited for fall. Hardier vegetables like carrots, kale, spinach, and beets often do better in cooler soil. Fill your beds with plants that don’t mind chilly nights and can handle short days. Use rich, well-drained soil but avoid letting it get too loose or overly watered.

Make it a habit to check your garden every few days. These short inspections can help you catch trouble before it spreads. Look for signs of tunneling, wilting, bug buildup, or uneven ground. Tackling little problems early saves you bigger work later.

Good mulching adds a layer of warmth to the soil while helping control moisture and keep weeds out. Use straw, bark, or shredded leaves and apply mulch in even layers, keeping it away from plant stems or root crowns. This prevents rot and keeps temperature levels more even as nights get cooler.

When you combine smart planting, regular upkeep, and preventive habits, your garden has a better shot at staying healthy. That foundation helps reduce the chances that moles or other pests take over.

Keep Your Fall Garden Mole-Free with Trap Your Moles

Mole control this time of year matters more than you might think. Their activity increases in fall when soil conditions are just right, and if you wait too long, their digging can create lasting problems. Root systems get lifted, plants weaken, and soil starts to shift in ways that throw everything off balance.

Getting ahead of mole problems can make all the difference. Early action not only prevents damage to your vegetables and flowers but also saves hours of frustration and costly repairs to your yard.

At Trap Your Moles, we understand how these pests operate and why fall mole control makes your planting efforts worthwhile. Our targeted yard mole control services are geared to stop damage before it spreads. If you’re already seeing tunnels or uneven spots, now’s the right time to act and keep your garden thriving.

If mole activity is starting to undo the hard work you’ve put into your garden, it’s a good time to bring in reliable help. Trap Your Moles offers the experience and tools to take charge of the problem with effective yard mole control. Let our team handle the digging so you can focus on enjoying a healthier, more peaceful outdoor space this fall.

Which Mole Traps Work Best for Different Soil Types?

Mole

Mole traps work, but only if they’re used the right way. One important part of successful mole control is knowing how well a specific trap type matches the soil it’s being used in. Not all soil is the same, and the way moles tunnel through it changes things. Soft, dry soil behaves differently than packed, sticky soil. If you’re relying on the wrong trap for your yard’s soil, you’ll probably end up wasting time and energy without seeing results.

Understanding how your soil works with each kind of mole trap can make a big difference. It’s not just about placing a trap and hoping for the best. It’s about setting something that actually works with the kind of ground moles are digging through. That’s the secret to catching them before they make a bigger mess of your yard or garden. Whether your ground is dry and loose or damp and dense, trap effectiveness depends on using the right tool for the job.

Understanding Soil Types and Their Challenges

Before picking a mole trap, first get familiar with the kind of soil you’re working with. Soil types play a big role in how moles move, dig, and nest. Each one creates specific challenges when you’re trying to catch them, and missing those details can throw off your whole trapping plan.

Here are the three main soil types you’re likely to run into, along with some of the issues each one brings when setting mole traps:

1. Clay Soil

– This kind of soil is dense and heavy. It packs tightly, especially when wet, making it harder for moles to dig down fast. Traps need to be sturdy and stay set without shifting when the clay moves with water or heat.

– Since clay can form a crust, surface tunnels may be closer to the top than in other soil types. That makes proper trap placement even more important.

2. Sandy Soil

– Sandy soil is loose and dry. It shifts easily and doesn’t hold its shape, which means traps can get dislodged or collapse in on themselves if not carefully placed.

– Moles tend to dig deeper tunnels to avoid dry air at the surface. That means finding active runs in sandy areas can take more work.

3. Loamy Soil

– Loam is a balanced mix of sand, silt, and clay. It’s soft and holds shape well, making it ideal for digging and trapping.

– Moles thrive in loam because living and feeding is easier. The downside for homeowners is more activity, which means you need reliable traps that can stand up over time in well-used tunnels.

Knowing your soil type can save a lot of frustration when your goal is to trap moles quickly. Each brings its own challenge, whether it’s trap stability, tunnel visibility, or proper depth.

Best Mole Traps for Clay Soil

Clay soil isn’t easy to work with, especially when it comes to mole control. The thick, heavy texture makes it harder for some trap types to perform well. But the good news is, there are traps designed to deal with these dense conditions.

For clay-heavy yards, here’s what works best:

– Scissor traps: These are solid and hold firm, even when the clay shifts or swells with moisture. They rely on steady pressure and can sit tightly in the tunnel without tipping.

– Choker loop traps: A good pick when tunnel space feels tighter. These are especially useful when you need the trap to react quickly without moving out of place.

Here are some tips when using traps in clay:

– Dig carefully when placing traps. Clay tends to form a hard crust near the surface, and rough digging can collapse the tunnel.

– Wait for a dry stretch. Saturated clay pulls in more moisture and softens up, which might keep the trap from triggering cleanly.

– Look for straight, clean tunnels near feeding areas. Moles in clay soil often reuse reliable same-depth runs, which makes it easier to find active spots.

Let’s say you notice moles showing up again and again in the same section of your backyard. If it’s heavy clay, their tunnels could be within the top 6 inches of soil, moving around older roots or rocky patches. Setting a heavy-duty trap directly on those runs, once they’re active, usually brings better results than setting multiple lightweight ones across a wider space. You just have to pick the right kind built to grip and maintain pressure.

Best Mole Traps for Sandy Soil

Sandy soil behaves differently than clay. It doesn’t stick together well, which means it shifts easily under pressure. That makes trapping tougher. Moles in sandy soil tend to dig deeper tunnels since the surface dries out quickly. These tunnels collapse more easily, and it’s harder to get a trap to stay in place. If your soil feels gritty and doesn’t hold its shape after squeezing it in your fist, there’s a good chance it’s sandy.

For sandy ground, traps need to be lightweight but stable. Try using:

– Plunger-style traps: These traps work well because they activate easily and don’t need to grip tight soil to be effective.

– Low-tension traps: A gentle trigger is better here, since a heavier trap might tip over or get buried when the dirt shifts.

Trapping in sandy soil can feel like trying to build a sandcastle during high tide. It keeps falling apart if you’re not quick and careful. But with the right steps, you can make trapping work.

Keep these points in mind:

– Pack the area around the trap firmly. Even though the soil is light, giving the trap a solid base helps it stay in place once set.

– Avoid trapping right after watering or rain. Wet sandy soil becomes unstable, and tunnels might collapse before the trap gets triggered.

– Look for feeding tunnels that run close to active garden beds or lawn edges. Moles in sand still follow food, and finding those paths saves you time.

If you notice trails near the sunny edge of your patio where the soil dries out fast, that’s a good clue moles might be digging deeper below. Be patient, press down carefully, and don’t rush placement. In soft dirt, it’s better to take extra time to find the proper run than to guess and miss.

Best Mole Traps for Loamy Soil

Loam is about as mole-friendly as soil can get. That also means it’s where you’ll usually find the most complex tunnels. With enough moisture, just the right balance of air, and room to dig, moles thrive in these conditions. The good news is that loamy soil tends to hold its shape well, and that works in favor of the person setting traps.

Here’s what usually works best in loamy conditions:

– Scissor traps: Easy to place in firm yet soft soil and reliable for clean catches.

– Harpoon-style traps: Good if tunnels are near the surface, since these don’t require deep digging.

Some helpful tips when working with loamy soil:

1. Make sure tunnels are active. With so much digging space, moles often leave behind older, unused runs. Press down on ridges and return later to check if they’ve popped back up.

2. Use gloves when setting traps. Loamy soil holds scent well. Touching traps with bare hands can leave behind your smell, and that might throw off your results.

3. Place traps on straight sections of tunnel, not along curves. That gives the trigger a better chance of working when the mole comes through.

Let’s say you’re working with a loamy backyard in mid-September. Temperatures are starting to cool, but roots and insects are still active below the surface. Moles will ramp up tunneling before the season shifts too far into fall. Setting traps during this time, especially near garden plots or tree roots, can stop the problem before it picks up speed.

Ensuring Successful Trapping in Any Soil Type

No matter what kind of soil you’ve got, a few general steps can help make mole trapping more effective. It’s easy to blame the trap when things go wrong, but more often it’s how and where it’s placed that makes the difference. Even the best tool won’t help if it’s not on the right tunnel or checked regularly.

Make the most out of your trapping efforts by keeping these tips in mind:

– Always confirm tunnel activity before setting traps. Flatten small sections of tunnel and return in 24 hours to see if it’s been rebuilt.

– Don’t rush placement. Moles move in patterns, and their paths often repeat in areas with steady food. If one tunnel isn’t working, don’t be afraid to move the trap.

– Check traps daily. A clogged trigger or collapsed tunnel can prevent them from working correctly, especially in sandy or wet conditions.

– Avoid disturbing the tunnel too much. When placing a trap, use tools to keep the shape of the tunnel intact as much as possible.

Even the perfect trap needs a bit of help from good timing, patience, and steady placement. If you’re still having trouble, the soil alone might not be the issue. Sometimes what you really need is expert help from someone who lives and breathes mole behavior.

Protect Your Yard from Moles with the Right Traps

Learning what kind of soil you’re working with can change the way you tackle mole problems. Each type comes with its own challenges, but with the right trap and setup, you can improve your chances of catching these pests before the damage piles up.

Whether you’re dealing with soft sand or thick clay, moles won’t wait for you to figure things out. A little knowledge on which trap works best and why makes a big difference when you need results. Finding the right match for your soil is a solid first step.

Make sure your traps work as effectively as possible by understanding the soil type in your yard and how it affects your trapping strategy. If you’re looking for dependable ways to protect your lawn from damage, learn how effective mole trapping can be when backed by expert support from Trap Your Moles. Keeping your outdoor spaces healthy and mole-free starts with the right approach.

Installing Underground Barriers to Block Mole Entry

Mole Barrier

Moles may be small, but they can wreak havoc across a property in no time. Their underground activity leaves behind soft ridges in the grass, dirt mounds, and damaged root systems, making it clear that something is invading your yard. Once they begin tunneling, it becomes tough to manage the issue without installing a solution that directly blocks their path.

Underground barriers offer a long-lasting way to keep moles out. These physical walls go below the soil, making it difficult—if not impossible—for moles to tunnel into target areas like gardens and plant beds. A proper mole barrier installation doesn’t hurt the animals but does protect your lawn from further destruction. If you want an option that works year-round, this method is one of the most effective choices.

Understanding Moles And Their Impact

Moles live most of their lives below ground, digging constantly in search of bugs and insects. They create a network of shallow tunnels just beneath the surface, and this constant movement can lead to widespread lawn issues quickly. Even if only one or two moles are active in the area, the damage tends to multiply fast.

Here are common indicators that moles are digging under your property:

– Soft, uneven ground that feels spongy underfoot

– Dirt piled in small cone shapes across the yard or garden

– Yellowing patches of grass or drooping plants caused by disturbed roots

While moles aren’t after your plants for food, their digging has consequences for the entire landscape. Uprooted plants, dried-out patches, and exposed tunnel entrances aren’t just hard to look at—they also affect how safe and functional your yard is for your family and pets. Uneven ground can make maintenance and playtime a bit risky, especially if new tunnels pop up week after week.

Moles also create an opportunity for other critters, like voles, to follow their paths deeper into your yard. And unlike moles, voles do chew on roots, bulbs, and greenery. This makes the presence of moles doubly frustrating since their activity opens the door to even more problems.

Types Of Mole Barriers

Dealing with moles effectively means picking the right kind of barrier. Not every technique works the same, and your choice depends on your yard’s layout and how long you’d like the solution to last. There are three main types of mole barriers: physical, sonic, and electronic.

Physical barriers are usually the best bet. These include:

– Hardware cloth: A heavy-duty metal mesh that can be placed around garden beds or paths

– Steel sheeting: Durable and long-lasting when run alongside buildings or fences

– Mesh-covered landscaping fabric: A lighter option that helps support other control efforts

These are installed underground and block moles from being able to dig through. Once placed properly, they stay put for years and don’t need to be powered or monitored.

Sonic and electronic barriers work differently. They produce vibrations or sounds designed to bother moles enough to move them along. Some homeowners see quick improvement, but these devices aren’t always dependable. Moles may ignore them, soil conditions can affect performance, and they usually need regular attention or battery changes.

If you’re looking for a method that lasts long and doesn’t depend on guesswork, physical options stand out. Just make sure they’re deep and strong enough to handle determined digging behavior.

Steps To Install An Underground Mole Barrier

With the right material chosen, you’re halfway there. The second part—installing it properly—is just as important. If the barrier isn’t placed deep enough or if you leave open gaps, moles may find a way around it.

Start by walking your yard and deciding the zones that need the most protection. This could be a vegetable garden, flowerbeds, or frequently used paths. Once you know the coverage area, follow these steps:

1. Dig a trench at least 24 inches deep. Some yards with looser soil may need deeper trenches.

2. Line the trench with a strong material like hardware cloth or steel.

3. Extend the top edge of the barrier a few inches above ground level. This discourages moles that surface.

4. Bend the bottom edge outward at a 90-degree angle to form an L-shape. This helps stop moles from burrowing underneath.

5. Fill the trench back in and pack the soil firmly to hold the barrier in place.

It may take some time, especially in larger areas, but this investment typically pays off. Raised garden beds are perfect candidates for full enclosures. Wrapping them entirely with hardware cloth and anchoring it well below the soil surface keeps roots safe and limits future intrusions.

If you’re unsure about how deep to dig or what barrier type pairs best with your soil type, speak with a mole control expert familiar with your region. The best materials still won’t do their job if they’re not installed the right way.

Maintaining Your Mole Barrier

Getting the barrier in the ground doesn’t mean you’re finished. Keeping it effective takes some routine monitoring and basic upkeep. Over time, soil shifts, tree roots grow, and weather events can loosen or damage sections of the barrier.

Here are a few steps to keep it working year after year:

– Inspect the protected zones twice a year

– Watch for new tunnels or mounds nearby that may show barrier breaches

– Look for soft earth or new gaps that hint at washed-away soil or settling

– Patch damaged or weak spots right away using matching barrier material

– Plant ground cover or install mulch around the barrier edges to keep soil packed in place

Yards that are newly landscaped or recently regraded may need extra monitoring during the first year, as settling happens faster. After that, a quick seasonal check each spring and fall is usually enough.

If your barrier borders a fence or structure, use that spot as a visual reference and include it in your regular yard care circuit. It’s easy to glance at while mowing, raking, or tidying up around the house.

You can even make upgrades that double as visual appeal—adding stones, edging blocks, or low plants along the barrier lines makes them blend in better while offering one more layer of protection.

The Long-Term Payoff of Burying the Problem

Installing a mole barrier isn’t just a short-term fix. When done right, it can keep some of the most sensitive parts of your property protected from underground damage. You get to avoid the constant pattern of repairing soil, replacing plants, and re-leveling sunken areas.

Barrier installation works well around high-priority zones like lawns, gardens, patios, and walkways. While it won’t guarantee that moles never reach other parts of your yard, it gives you control where it matters most.

If moles have already made themselves at home, consider working with a professional to trap and remove them before installing anything. Stopping the current activity lets the barrier do its job without immediately getting challenged by a fresh wave of tunneling.

Once the ground is secure, the payoff becomes clear, and the peace of mind is noticeable. Protecting what you’ve planted and planned for is always worth the effort.

Protecting your yard from determined moles can transform how you enjoy your outdoor space. If you’re ready to take control, explore how mole barrier installation with Trap Your Moles can help defend your lawn from future mole disturbances, ensuring it remains pristine and safe for everyone.