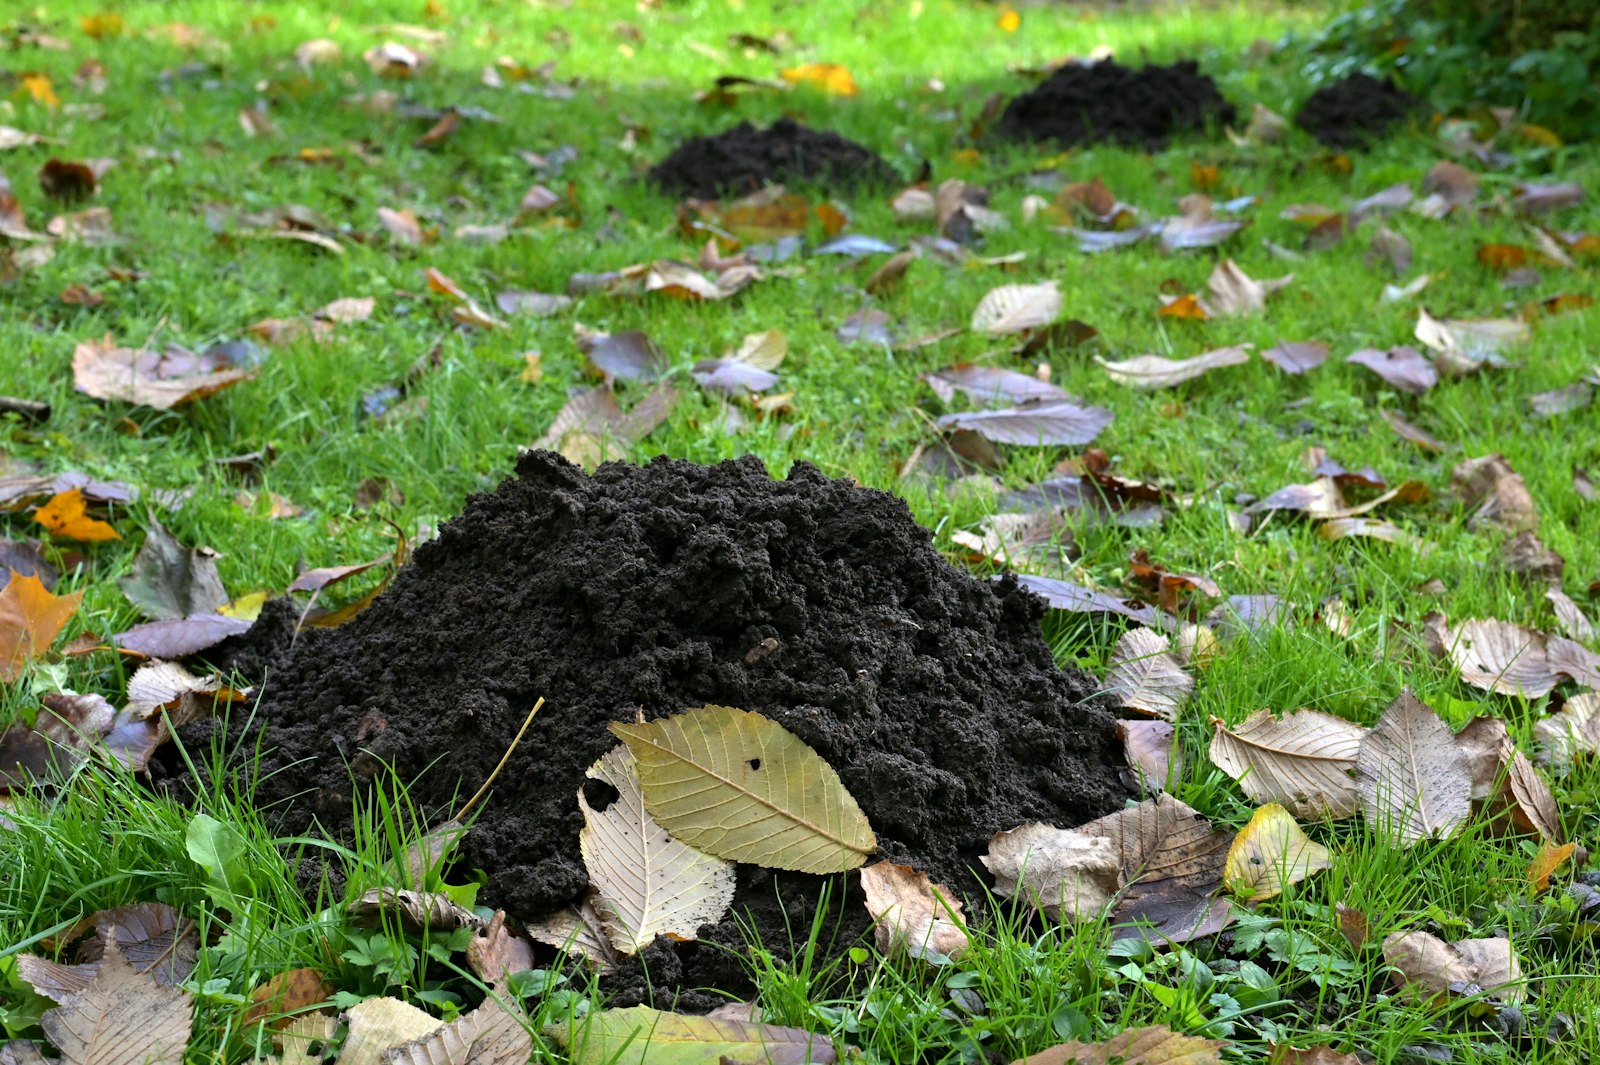
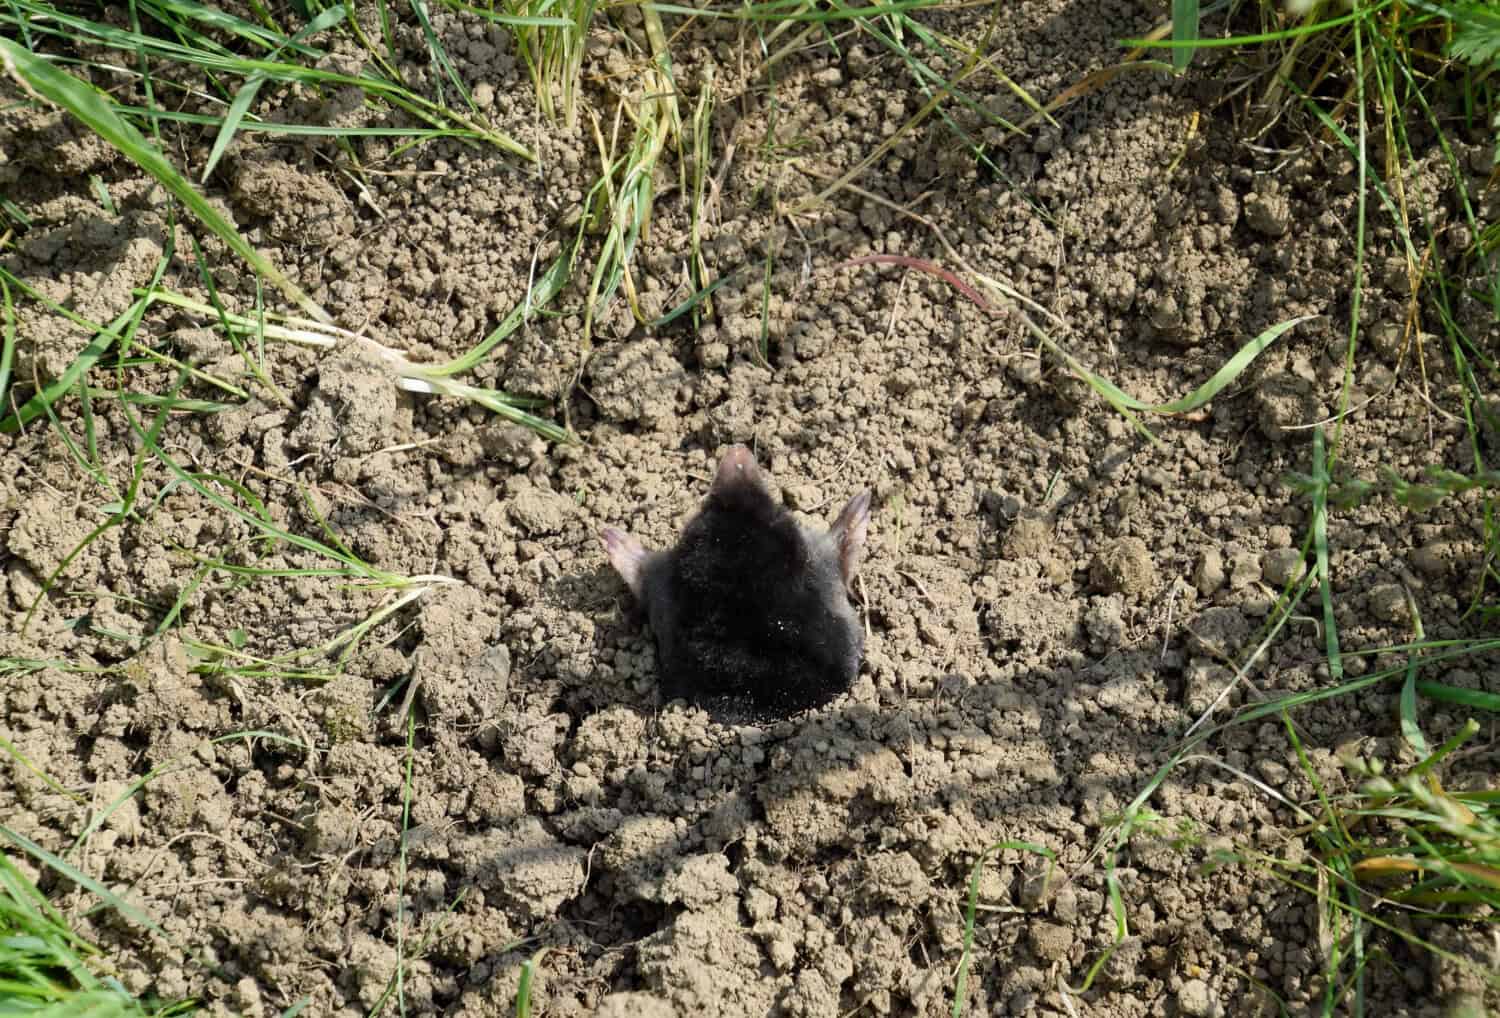
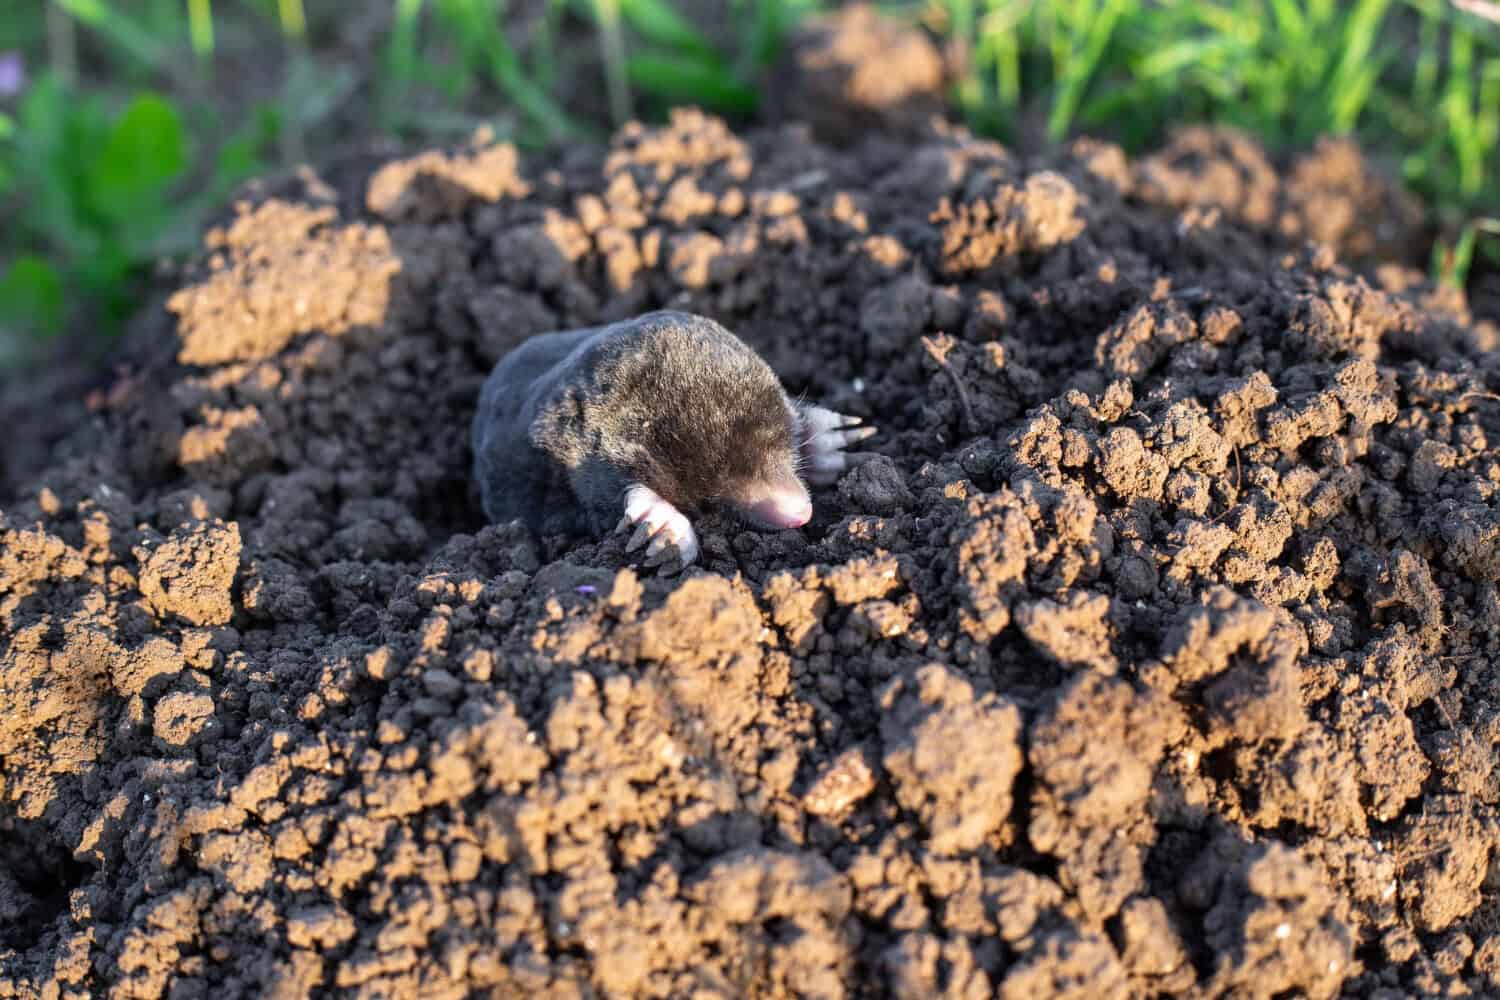
Moles do not hibernate. Here is what they really do under a frozen Cincinnati lawn all winter, why the molehills stop, and why waiting for spring costs you.
Continue readingThe only mole solution in greater Cincinnati and Dayton. (513) 518-5639
Moles do not hibernate. Here is what they really do under a frozen Cincinnati lawn all winter, why the molehills stop, and why waiting for spring costs you.
Continue reading
Moles do not care how much you spent on sod, seed, or landscaping. They just care that your soil is soft and full of food. One day the turf looks fine, the next day you are stepping into soft spots and lumpy ridges. Lawns get ugly fast, and people get frustrated even faster.
On residential lots, that means twisted ankles, bare patches, and chewed-up flower beds. On commercial and HOA properties, it means angry tenants, unsafe walkways, and fields that are not safe to play on. Many property owners in the Dayton area pour money into castor oil, solar spikes, chewing gum, and every new “miracle” product on the shelf, then watch fresh tunnels show up right next to yesterday’s purchase.
We see the same outside mole control service mistakes over and over. When those mistakes stack up, moles keep tunneling, turf repair costs climb, and the property keeps getting worse. Here is a clear breakdown of what goes wrong and what needs to change.
A lot of people hope mole activity will just burn out on its own. They see new runs in late summer, shrug, and say, “We will deal with it in the spring.” That delay is one of the biggest mistakes we see on Dayton properties.
Late summer through fall is prime mole time in our area. Soil usually has enough moisture for easy digging. Food is active. Moles are busy building and feeding before winter. That means:
When you wait, you are not holding things steady. You are giving moles months to expand their network. By the time spring comes around, the damage is baked in. Lawns sit on top of a web of tunnels, and what used to be a few runs can turn into:
The earlier a proper mole control service starts, the less ground is lost. Stopping active moles while the damage is still contained is always easier than trying to fix a season of unchecked tunneling.
Repellents sound good on paper. Spray something, spike something into the ground, then wait for the moles to leave. The problem is simple. Repellents move moles. They do not remove moles.
Hardware store products like:
may shift mole runs from one part of a property to another. For a week or two, one corner looks better, then new ridges pop up across a different lawn panel or along a different bed line. On a larger property, that just means you spent time and money to rearrange the damage.
A real mole control service focuses on trapping and taking animals out of the system. That is how you cut down on fresh tunnels in the first place. Repellents have to be reapplied over and over, especially after rain or irrigation cycles. By the time you spread, spray, and re-buy, that “cheap” option often turns into a slow-moving headache.
Targeted trapping is different. Once problem moles are actually removed, those same high-visibility areas, like front lawns, entrances, and fairways, can stay quiet much longer instead of being chewed up again and again by the same animals.
When turf starts to buckle, many people call whoever they use for ants and spiders. That is another big mistake. General pest programs are usually built around bait stations, sprays, and indoor or surface pests. Moles are a different problem.
Moles live and hunt deep in the soil. They do not move like mice and they do not feed like common “bugs.” Controlling them takes:
A general pest technician may lay out bait or basic traps, but without proper placement on active runways, those tools sit in dead areas and catch nothing. An experienced mole trapping company spends most of its effort figuring out where the moles are traveling and when those runs are active. That means looking at:
Once that pattern is clear, traps can be set where the odds of a catch are actually high. That difference in focus is what separates real mole control service from a general pest visit that leaves the tunnels untouched below the surface.
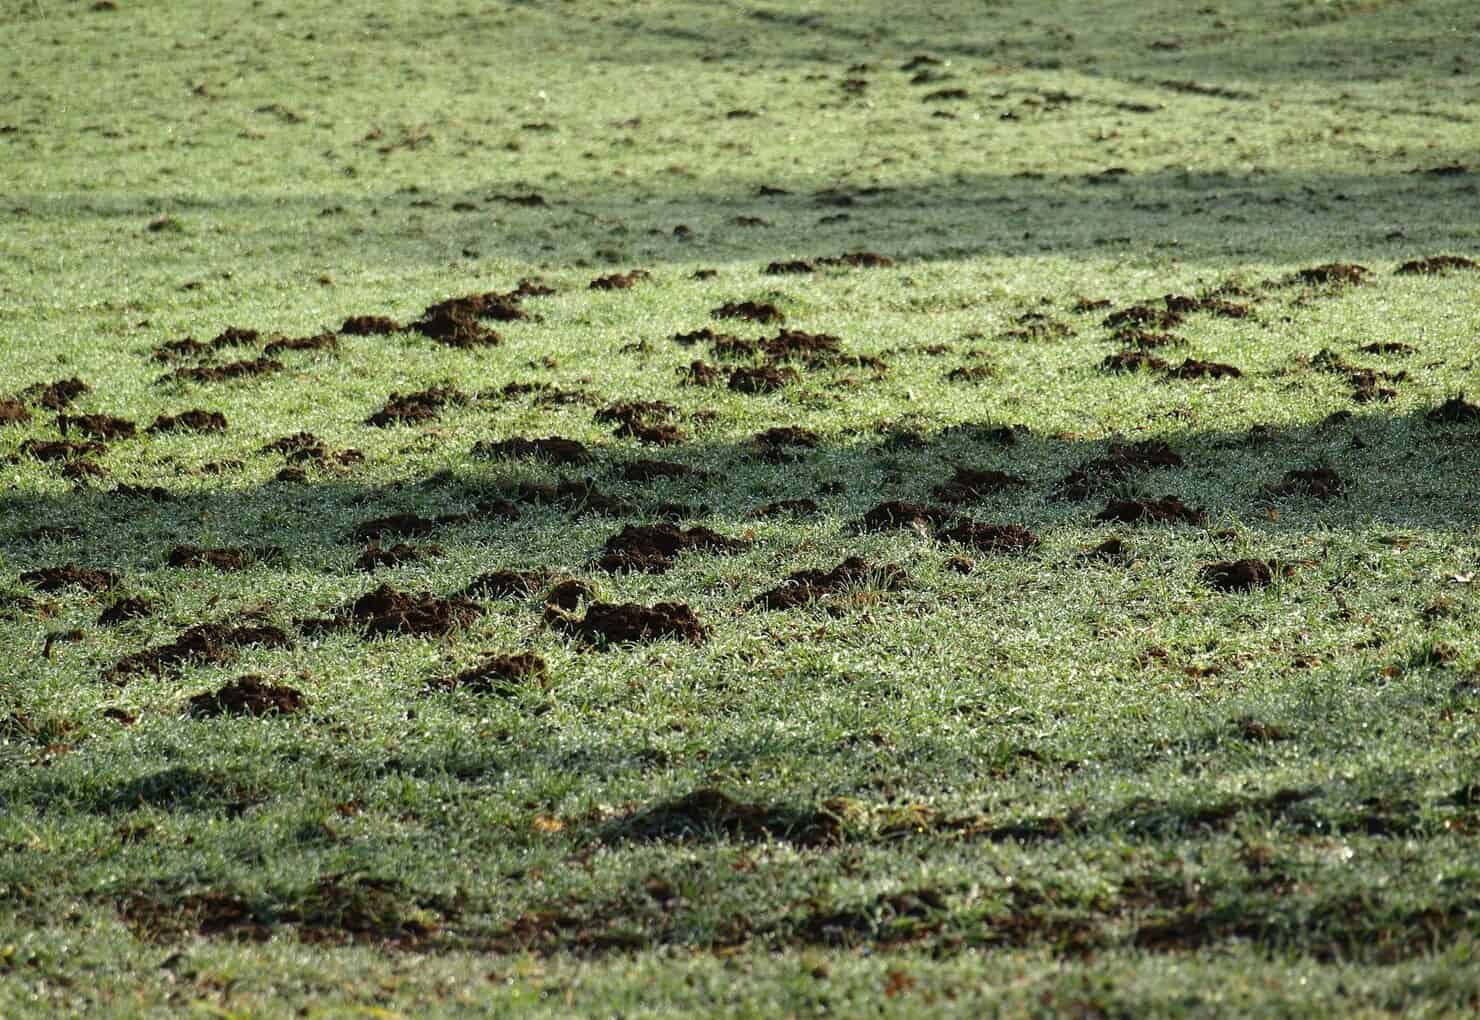
Those raised tracks and mounds across your lawn are just the surface sign. Under that, moles can create deeper tunnels that run under more than grass. Shallow runs are ugly. Deep runs are risky.
Underground activity can:
On commercial sites, HOAs, sports fields, and golf areas, that brings more than just lawn complaints. Trip hazards show up where turf is hollow. Playfields feel spongy and unsafe. Roughs, common areas, and side slopes start to slump, and people notice.
If an outside mole control service only rakes down mounds and works on the top inch of soil, it is not solving the full problem. Effective control has to address both the surface feeding runs and the deeper travel tunnels. That means tracking activity through the property, not just smoothing dirt and calling it done.
Another common mistake is treating mole control as a one-time event. A few traps go out, one or two animals are removed, and then everyone forgets about moles until the next big flare-up. On larger properties around Dayton, that pattern invites repeat trouble.
Moles are drawn by food, mainly grubs and earthworms. Even if current moles are removed, new animals can wander in from:
That is why many properties benefit from monitoring cycles. Instead of waiting until tunnels are all over the place again, a good mole control program checks hot spots and edges on a regular schedule. Small problems are caught while they are still small.
For HOAs, golf courses, and athletic fields, this kind of plan helps:
You can react after every big burst of damage, or you can treat mole control like mowing and irrigation, something that stays on the map all year.
Most wrecked lawns and torn-up common areas get that way from the same set of mistakes. People wait for “later.” They trust repellents that only shuffle moles around. They lean on general pest programs that are not built for deep-soil tunneling. They ignore the hidden damage below the surface. Then they skip follow-up until the next crisis hits.
Trap Your Moles focuses on wildlife and mole trapping for residential and commercial properties in the Cincinnati, Dayton, Springfield, and Northern Kentucky region. We spend our time reading soil, tracking runways, and removing the animals that are actually doing the damage.
If moles are tearing up your lawn, fields, or common areas, it will not get better by waiting or re-spraying the same repellent. A focused mole control service can stop the tunneling, protect your turf, and help you stay ahead of the next wave of activity.
Call (513) 518-5639 for a free estimate.
If you are tired of fresh mole hills appearing overnight, let Trap Your Moles™ restore your lawn with our professional mole control service. We use targeted, effective methods to quickly reduce activity and help prevent future damage. Reach out today and we will walk you through the next steps and schedule a convenient visit. Have questions before you get started? Simply contact us and our team will be happy to help.
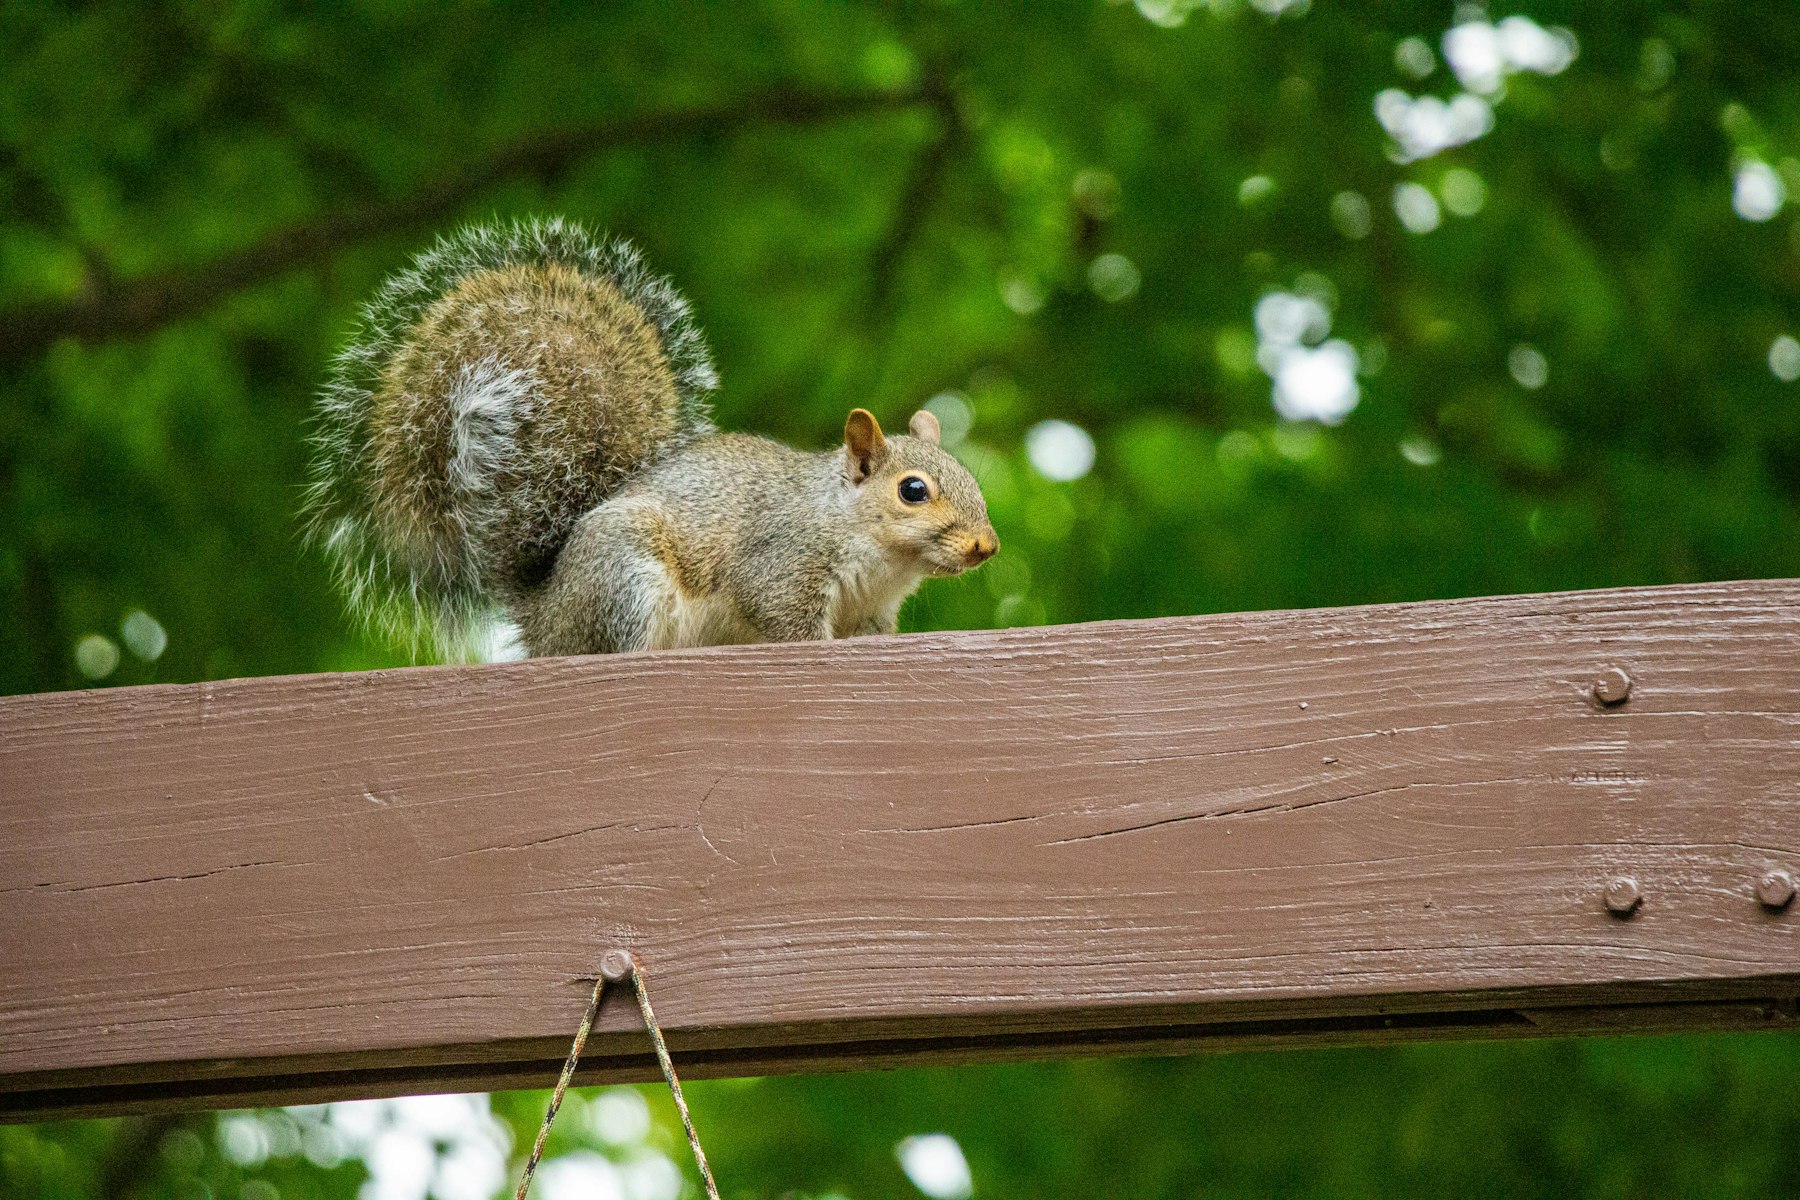
Sealing the hole is not the fix. How squirrels get into a Cincinnati attic, why they keep coming back to the same roofline, and what actually stops it.
Continue reading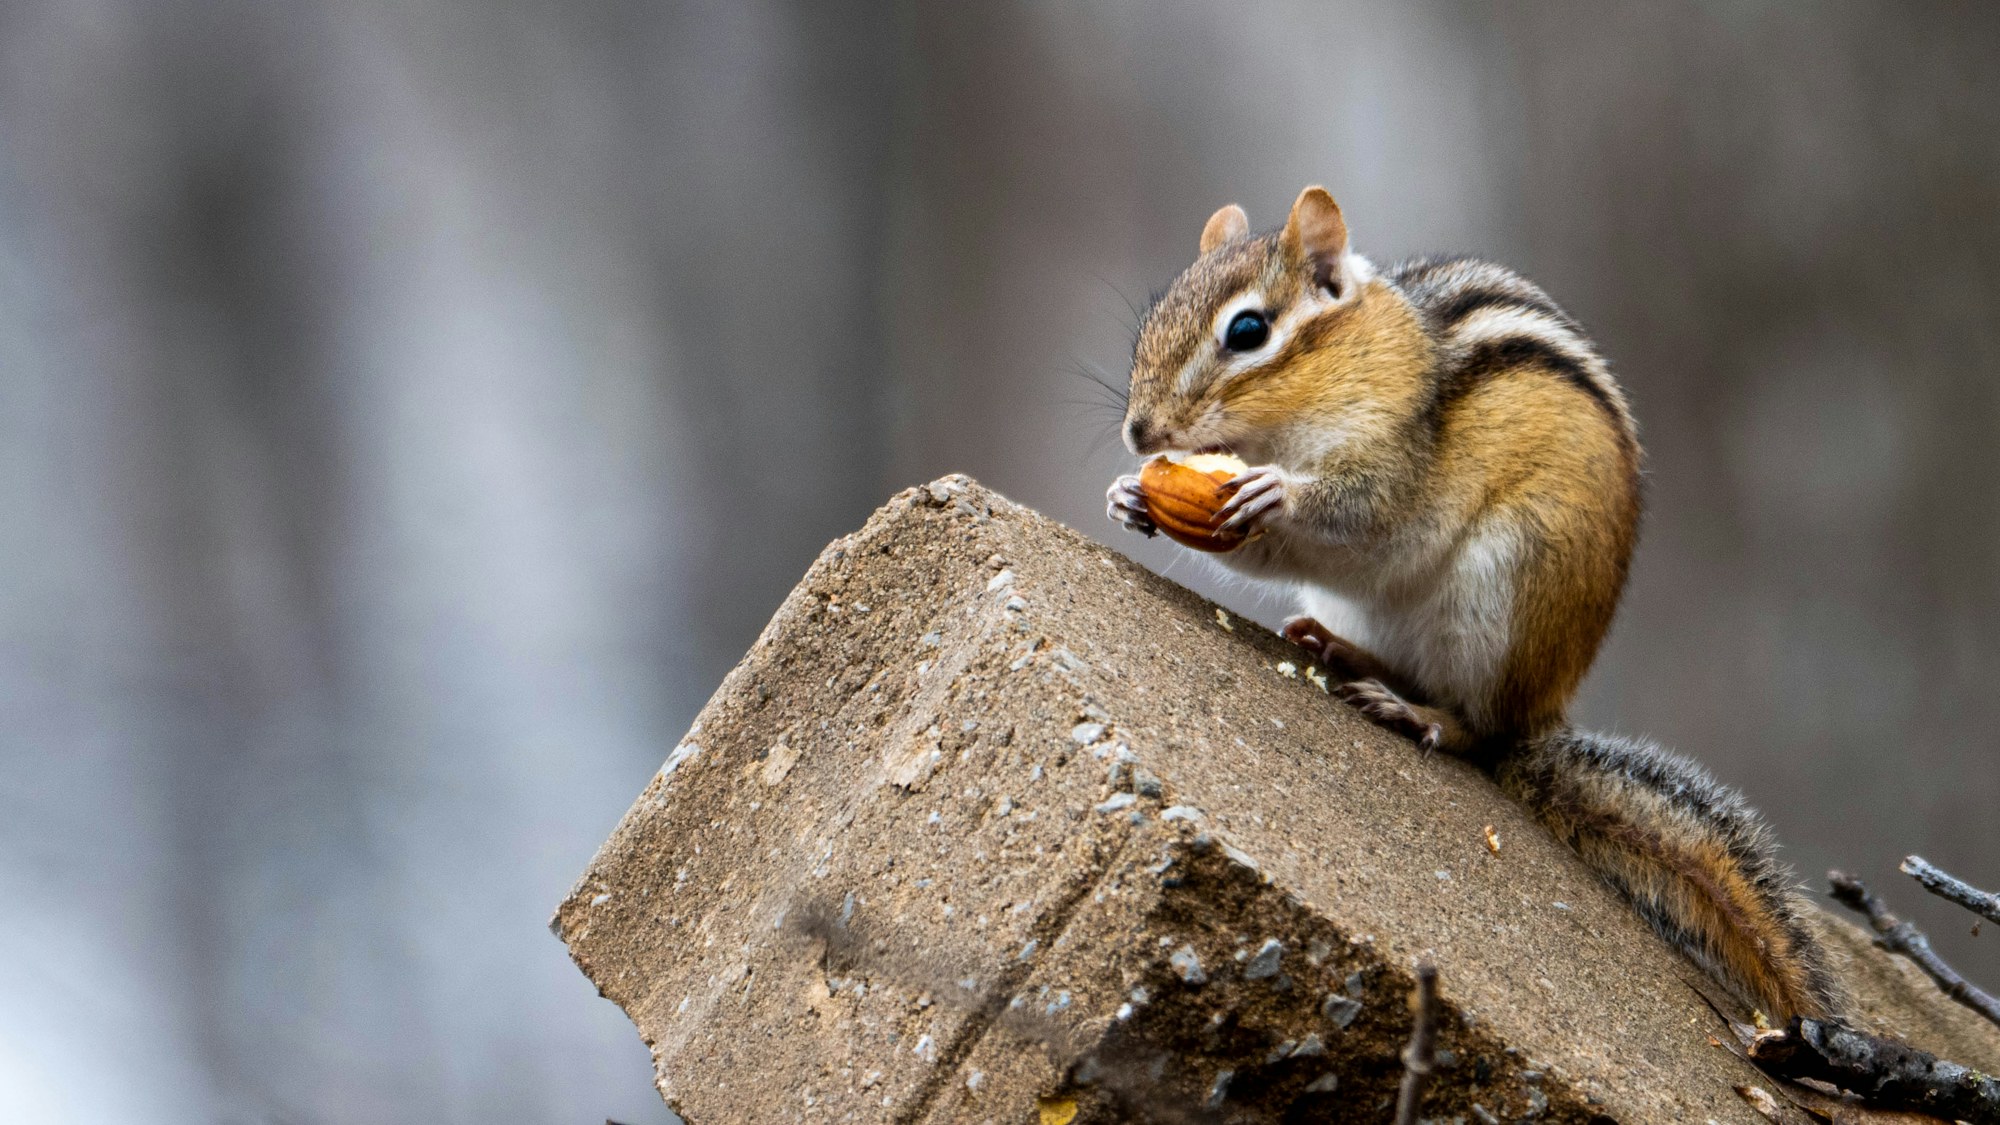
Chipmunks get into Cincinnati homes through gaps you would never think twice about. Here is how they get in, what they wreck inside, and when it needs a pro.
Continue reading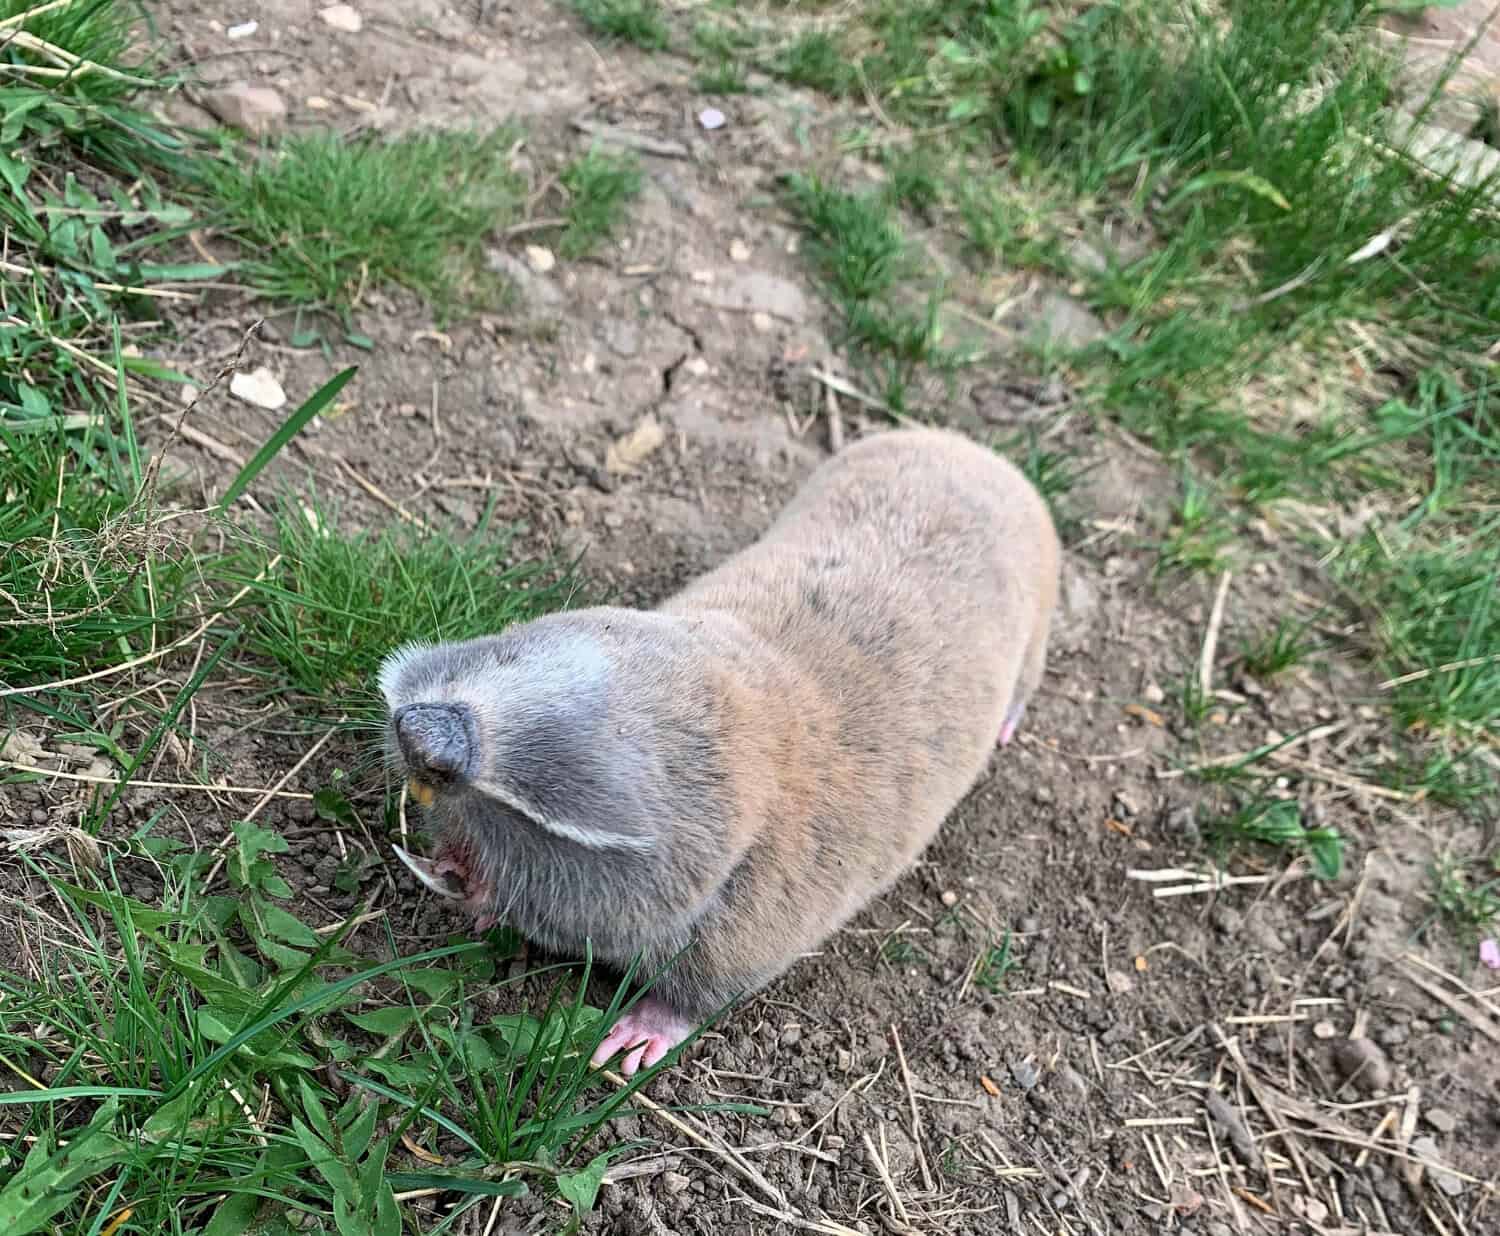
Soft, lumpy turf. Twisted ankles in the yard. Fresh sod that looks great for a month, then turns into a bumpy mess. Many Dayton homeowners and property managers keep paying for lawn repairs, grub control, and store repellents, only to watch moles tear it all up again.
Around Dayton, mole activity spikes hard twice a year in spring and again in fall. Most people wait until raised ridges and mounds are everywhere before they act. By then, the damage is already under your grass and the repairs get expensive.
We want to give you a clear, practical timing guide for mole removal in Dayton, Ohio, so you can act before the tunnels show on the surface. We work in Greater Dayton every day as specialist trappers, so we see the same pattern over and over. When you understand when moles move and feed, you can plan mole trapping on your schedule, not on theirs.
Moles are small, gray insect-eaters. They are not rodents, and they are not after your plants on purpose. They eat earthworms and soil insects. That is why mouse or rat bait will not fix your mole problem. You can poison every rodent on the block and those tunnels will still keep growing.
Under your lawn, they build two main types of tunnels:
Shallow runs cause:
Deeper runs often show up as:
In our local Miami Valley clay soils, worms and soil insects do very well. When you have a well-kept lawn with irrigation, regular watering, and nice thick turf, you are actually creating perfect mole habitat. Healthy soil, consistent moisture, and stable temperatures are exactly what they like.
It usually takes only one or two moles to make a yard look “infested.” A single animal can run a big network of tunnels. If those moles are not trapped out correctly, new ones can move into the same system later. That is why some yards feel like they never get a break.
From late March through early June around Dayton, the soil starts to warm up. Worms and grubs move closer to the surface. Moles respond by ramping up their shallow feeding runs right when your lawn is waking up and new grass is trying to grow.
Here is the timing problem. By the time you see long raised ridges across the yard, that mole has already been working for weeks. The tunnels were there while the ground was still damp and soft. Waiting until the lawn is clearly torn up means more repair work later.
For spring mole removal in Dayton, Ohio, the best time to start is:
Those first light runs are your warning. That is when trapping is most efficient. You catch the animals before they spread across open turf, landscape beds, play areas, or sports fields.
Many people try DIY first in spring:
These usually do not remove the animals. Moles live underground and are built for that life. A professional trap line that is checked often, placed in the right runs, and adjusted to soil conditions actually takes the moles out, not just annoys them.
Late August through November, the pattern shifts again. The soil cools down, summer drought often eases, and worms come back up to comfortable levels. Moles respond with another heavy feeding surge. In many yards, they get more focused and aggressive in their tunneling.
Fall activity can be sneaky. The grass is already mature and thick. You might not notice fresh runs until you start leaf cleanup or see odd lines under the leaves. Under that cover, the roots are being shredded and loosened.
Fall is the best time to break the cycle for the next year. Moles trapped in fall do not get to set up winter territories under your yard, beds, or sports fields. That means less pressure when spring growth starts, and fewer new tunnels popping up in the first warm stretch.
Good triggers to bring in trapping in fall are:
If you reseed or lay new sod in late summer or fall, that tender root system is a magnet. The soil is soft, moist, and full of food. Getting moles out of those areas quickly protects your investment.
Both spring and fall bring strong mole activity. They just hit your lawn in different ways.
Spring trapping:
Fall trapping:
For homeowners, here is how we usually think about timing:
For commercial properties and HOAs, the stakes are higher:
A focused professional service in our region pays close attention to:
The trap plan shifts with each season so you are not chasing new tunnels all year.
Moles around Dayton usually spike twice, in spring and again in fall. Both seasons cost you money, whether it shows as lumpy, ugly turf or root damage that shows up later. Fast, targeted trapping is almost always cheaper in the long run than another round of repellents and grub control that does not solve the real problem.
Instead of reacting in anger when tunnels are everywhere, use the calendar. Plan an inspection before your busy season, whether that is spring green-up at home, fall reseeding, or key tournament and event dates on commercial turf. When you are ready to stop mole damage before it starts, call Trap Your Moles at (513) 518-5639 for a free estimate.
If moles are tearing up your lawn, we can step in quickly with targeted mole removal in Dayton, Ohio that protects both your property and your peace of mind. At Trap Your Moles™, we inspect your yard, identify active tunnels, and create a plan tailored to your specific mole problem. Reach out today to schedule service or ask questions, and we will walk you through every step. If you prefer, you can also contact us to get started.
Groundhog, mole, or vole? A Cincinnati trapper explains how to read the hole in your yard, what each animal damages, and why the wrong ID costs you a season.
Continue reading
A yard chewed up by moles feels awful under your feet. The ground is spongy, mower wheels sink, and you keep kicking fresh dirt mounds even after pouring money into castor oil, poison peanuts, sonic spikes, and battery gadgets. Once a professional finally traps and removes the moles, you still walk outside and think, “Why does my lawn still feel like a sponge?”
Stopping the live moles is the first win. After that, you still have a maze of tunnels, air pockets, and damaged roots under your grass. Here we walk through a clear recovery plan for Dayton lawns after professional mole removal, so your yard becomes solid, safe, and decent looking again instead of a soft, sinking mess.
A full mole infestation is mostly hidden under the surface. What you see on top is only part of the story. Under your grass, the moles have built:
All that digging separates grass roots from the soil. Water drains into tunnels instead of soaking the root zone. Even after every mole is trapped and removed, the old tunnel system is still there. If you ignore it, you get:
So when you think, “The moles are gone, so why is my yard still wrecked,” the answer is simple. The animals are gone, but the broken soil structure is not. Without a plan to fix what they left behind, recovery is slow and patchy.
Trapping is the only proven mole solution. Repellents, sonic spikes, poison peanuts, and castor oil generally do not work, so once trapping is complete, fixing the soil they tore up is the only way your lawn will fully recover.
In the Dayton area, Eastern ground moles are active all year. They do not hibernate. Trapping can happen in any season, so repair timing needs to match both your trapping date and the weather.
Here is how we look at timing:
Many Dayton yards sit on heavy clay that compacts easily. Clay soil can hold the tunnel shape longer, then collapse all at once, which creates sudden dips and puddles. On these lawns, you often need more aggressive compaction and more organic matter in your topdressing mix to help with drainage and stability.
Before you repair anything, make sure the mole removal is truly done. If moles are still active, they will simply reopen your work and waste your time. A specialist focused on mole removal in Dayton should confirm that activity has stopped before you move into full repair.
Walk the entire yard at a slow pace. Use flags, stakes, or even spray paint to mark:
If the ground gives when you step, mark it. Those are the areas that need attention.
Next, collapse the runs. For most raised tunnels, you can simply:
After that, use a hand tamper or heavy tool to compact bigger soft zones. The goal is to remove air pockets and create a tight base again. Do not be afraid to compact in stages. Sometimes you tamp, wait a few days, then tamp again as the soil settles.
All those tunnels do more than loosen soil. They create dry pockets and separated layers. Roots cannot cross air gaps, so the grass above starves even if you water and fertilize.
For deeper sinks and obvious voids, cut out the weak turf as a shallow patch and fill the hole with a mix of quality topsoil and compost. That blend:
Lightly pack each layer as you go so you do not leave hidden air pockets. Shape the surface so water flows away from your house, walks, and patios. Good grading cuts down on puddles forming in old tunnel zones.
Once the soil is firm and level, overseed thinned or bare areas with a grass mix that matches most Dayton lawns, usually a cool-season blend. For better results:
Early on, shorter, more frequent watering is better than long floods that can wash seed into the old tunnels. Once the new grass reaches mowing height, cut high and keep your mower blades sharp. Do not scalp the new growth. Strong roots will knit the soil together and help lock in your repairs.
Mole tunnels do not stop at the lawn. They often follow edges and structures. Some of the highest risk spots are:
In these areas, tunnels can create voids that lead to shifting pavers, cracked corners, or wobbly steps. To repair, carefully lift pavers or stones in the affected section, then fill and compact the soil underneath. Reinstall the hardscape on a firm, level base.
For planting beds, peel back mulch, gently collapse runs, then top off with soil and compost. Be careful not to bury plant crowns or pile soil against stems. Avoid heavy overwatering in these sections. Old tunnels can still settle, so light, steady moisture is better than soaking the area and causing more sinking.
Once you have trapped the moles and repaired the lawn, you want to protect your investment. Repellents, sonic spikes, castor oil, and poison peanuts sound simple, but they rarely stop new moles from coming in from neighboring properties. Eastern ground moles in the Dayton region stay active all winter, which means they can move back in any time.
A practical plan is to:
If you see new, active signs, bringing in a professional early makes a big difference. Catching a new mole quickly prevents another full maze from forming and keeps your lawn from going back to that soft, uneven feel.
At Trap Your Moles, mole removal is our core specialty. We are a specialist mole trapping company, not a general pest control company that sprays and hopes for the best. We also handle groundhog, raccoon, squirrel, vole, and chipmunk removal when they tear up your property.
We use humane mechanical trapping only, with zero poisons and zero toxic chemicals, so your family, pets, and soil stay safe. We are licensed, insured, and bonded, and we hold an A+ rating with the BBB. We guarantee our work. If mole activity returns during the service period, we come back at no additional cost.
Because we work every day across Dayton, Springfield, Cincinnati, and Northern Kentucky, we know the local soils, typical tunnel patterns, and the right order to handle trapping first, then smart repair so your yard can finally feel solid again.
If moles have turned your lawn into a soft, sinking mess, call Trap Your Moles at (513) 518-5639 for a free estimate and a clear plan to get your yard back in shape.
If you are seeing fresh tunnels or mounds, now is the time to act before the damage spreads. At Trap Your Moles™, we use proven techniques to quickly and humanely resolve active infestations. Learn how our expert mole removal in Dayton can restore your lawn and prevent ongoing problems. Have questions or ready to schedule service? Just contact us and we will walk you through the next steps.
Fresh lines on the infield or a soccer pitch. Grass cut tight. Bases or goals set just right. Everything looks ready. Then the next day, there are raised ridges, soft spots, and dirt mounds across the baselines and in front of the net. The field went from game-ready to risky overnight.
Many field managers know this cycle. Money goes into castor oil sprays, sonic spikes, “poison peanuts,” and hardware traps. Crews waste hours pushing soil back down. The moles keep working. The tunnels spread. The complaints start. Players trip. Parents worry. Coaches want answers.
For athletic directors, grounds crews, property managers, and park managers, mole damage is more than ugly turf. It is a safety issue and a liability problem. Twisted ankles, knee injuries, rescheduled games, and angry emails all grow from those small ridges in the grass. Waiting it out or trying one more repellent just gives the moles more time.
The only proven way to stop mole damage is humane mechanical trapping. No poisons. No toxic chemicals. Trapping has to be done by people who understand how moles move and how sports seasons and daily use schedules work. That is where a professional mole control service that is licensed, insured, bonded, and A+ BBB accredited makes a difference. Fields stay safer, turf holds up better, and your season and property stay on schedule.
Eastern ground moles live just under the surface. They tunnel through the root zone, pushing soil up and leaving shallow runs and mounds. On a lawn, that looks bad. On an athletic field, or any high-use turf, it can change how a player or visitor plants a foot or lands from a jump.
On different types of fields, those soft spots matter in different ways:
When a mole lifts the soil, it leaves hidden voids under the sod. A rake or roller can flatten the top for a day. That does not fix the hollow space under the grass. Cleats hit that gap, the ground gives way, and all of a sudden a simple cut move turns into a rolled ankle or a twisted knee.
Eastern ground moles do not hibernate. They stay active year-round, following food, like grubs and earthworms. During warm weather, when irrigation is running and fields or lawns see heavy use, tunnels can spread quickly. That means the same stretch of turf can go from solid to unsafe between a weekend tournament and Monday practice, or between a quiet week and a busy weekend in your yard or office park.
Athletic fields and commercial properties are held to higher safety standards than a backyard. “Wait and see” is not a good risk plan when kids, teens, customers, and employees are sprinting, cutting, and walking across your turf every day.
When moles show up, most people start with store products. On sports turf and large lawns, those options almost always disappoint.
Common things tried on fields and properties include:
Sports fields and large landscapes are usually big, irrigated, and heavily used. Water from rain and sprinklers moves castor oil and other repellents out of the main tunnels. Moles can tunnel a little deeper or change direction. Poison baits are aimed at animals that eat seed or pellets, but moles mostly eat live insects and earthworms, so baits often get ignored.
DIY tools also have hidden costs on sports turf and commercial grounds:
On top of that, poisons and toxic products raise real concerns anywhere kids and pets are. They pose risks to non-target wildlife as well. For schools, parks, HOAs, and commercial properties, that is not worth the small chance of success.
Professional mole control that uses humane mechanical trapping only, with zero poisons and zero toxic chemicals, is the reliable answer for fields and properties that must stay open and safe.
Successful mole control on athletic fields and busy properties has to respect the schedule. Practices, games, mowing, events, and tenant traffic leave very small windows for field and turf work. A good mole control service plans around that, not the other way around.
A typical in-season approach looks like this:
Crews stay out of active play zones during games. Flags, maps, and notes keep everyone aware of where work is happening, so there are no surprises for coaches, referees, or tenants. Since there are no toxic chemicals involved, there is no overspray, no smell, and no product drying time.
Because Eastern ground moles are active all year, treatment can also be planned in the off-season. Tackling mole activity when fields and lawns are resting helps cut pressure before the next season starts. That means fewer emergency calls when games and events return.
Responsiveness is key. When a new run pops up on a pitcher’s mound, inside the penalty box, along a sideline, or across your front entrance lawn, you need service quickly. Our work is guaranteed. If mole activity returns during the service period, we come back at no additional cost.
Once trapping work brings mole activity down, it is finally safe to fix the surface for real. Repair before that point is like patching a roof while it is still leaking. The damage will just come back.
A fast, simple repair routine for grounds crews usually includes:
High-risk zones should get first attention, such as:
Warm soil and regular irrigation help new seed take hold quickly, as long as the underground tunneling has stopped. That is the key. Trap Your Moles handles the animals with humane mechanical traps and confirms that activity has dropped. Your turf crew or preferred vendor then repairs the surface. The work holds much longer when new tunnels are not pushing up from below.
The best way to keep moles from canceling games or tearing up your lawn is to plan ahead. A season-long mole plan treats fields and common areas the way you already treat mowing, fertilizer, and lining, as part of regular field and property care, not a fire drill.
A strong plan can include:
Schools, parks, clubs, HOAs, and commercial properties with shared fields and lawns can bundle multiple sites under one agreement. That keeps costs predictable and gives staff one point of contact for mole issues across all properties.
Trap Your Moles works across Greater Cincinnati, Dayton, Springfield, and Northern Kentucky. We focus only on humane, chemical-free mole trapping. We are A+ BBB accredited, licensed, insured, and bonded. We guarantee our work. If activity returns during the service period, we return at no additional cost.
If moles are turning your athletic fields, lawns, or common areas into obstacle courses, it will not fix itself. Call Trap Your Moles at (513) 518-5639 today for a free estimate.
If you are seeing fresh mole activity, our team at Trap Your Moles™ is ready to help restore your yard quickly and safely. Our professional mole control service focuses on effective, humane solutions tailored to your property. Reach out today so we can assess your situation and walk you through your best options. To schedule an appointment or ask questions, simply contact us.
Mole tunnels tearing up your lawn are frustrating. Raised ridges, soft spots, and ugly mounds can show up almost overnight, even after you already paid for grub control once or twice. Many homeowners and property managers in the Cincinnati area feel stuck in this loop, wasting money on treatments and products that do not work.
You get told that if you kill the grubs, you will lose the moles. So you spend money on lawn treatments and store products, but the tunnels keep showing up. The truth is simple: Grubs are not the main problem; the moles are. Treating grubs alone will not get rid of moles in your yard in Cincinnati or the surrounding areas.
We specialize in humane, mechanical mole trapping for homes, HOAs, golf courses, commercial properties, and public grounds across Cincinnati, Dayton, Springfield, and Northern Kentucky. We actually remove the animals that are causing the damage. Let us walk through why grub treatments fail, what really attracts moles, and what options work before late summer and fall activity picks up even more.
Most people are told that moles only eat grubs. That sounds simple, and it sells a lot of grub products, but it is not true for Eastern ground moles in our area.
Moles eat a wide range of soil insects, such as:
Earthworms are one of their favorite foods. A healthy lawn in Cincinnati or Northern Kentucky tends to be full of worms, especially if it is irrigated, fertilized, and well cared for. Even after heavy grub treatments, those worms are still there, moving through the soil and pulling moles right along with them.
A few key points about mole behavior in local yards:
That last point is important. If your plan is to treat grubs in one season and hope moles go away, you are missing months of active feeding. As long as your soil has worms and other insects, there is plenty of food to keep moles tunneling under lawns, beds, and sports fields.
Grub control can reduce one food source. It does not remove the moles that are already living and feeding in your tunnels. The animals are still there, and they are still hungry.
Here is what usually happens:
By the time you realize the treatment is not solving the problem, you may be thinking about a second or third round of chemicals. Some people also add “mole bait,” poison peanuts, or other toxins into the mix. Now you have chemicals in the same turf where kids, pets, and customers spend time, and the tunnels are still growing.
Moles are built to move. If one food source drops in a section of your yard, they can:
If your goal is to get rid of moles in your yard, trying to starve them out with grub control alone does not work. You might slightly reduce some feeding in one zone, but you will not remove the living animals that do the digging.
The only reliable way to stop mole damage is to physically remove the moles. That means professional trapping by people who understand mole behavior and local soil conditions.
Many property owners in our area try almost everything else first:
These methods rarely give lasting relief. Moles spend most of their time underground, with strong survival instincts. They often avoid baits, move around repellents, or simply tunnel deeper.
Proper trapping is different. It is based on:
We use only humane mechanical traps, placed below ground by trained technicians. There are zero poisons and zero toxic chemicals. That is safer for people, pets, and non-target wildlife.
Because Eastern ground moles stay active all year, trapping can be done in every season. Fresh tunneling in summer is actually helpful, since new runs are easy to see and pattern. Trapping at that point stops damage before it spreads into late summer and fall.
If you have only dealt with lawn spray crews before, mole trapping will feel different. The focus is not on chemicals. It is on reading the ground and outsmarting a very specific animal.
A typical professional trapping process includes:
When soil is soft from irrigation or rain, we can quickly tell which runs are active. Moles tend to reuse main travel routes, so once we locate those, we know where to focus. Fresh, raised tunnels and new mounds are especially good signs for effective trapping.
Trap Your Moles is licensed, insured, bonded, and A+ BBB accredited. That helps protect homeowners, HOAs, commercial property managers, and municipal clients who need dependable, documented service. Our guarantee is simple: If mole activity returns during the service period, we come back and continue trapping at no additional cost.
This approach works on:
The size of the property changes the map, but the process stays the same. Find the active moles, trap them, remove them, and monitor for fresh activity.
Grub treatments alone will not solve mole damage. Repeated spending on repellents, sonic spikes, and gimmick products usually just delays the real fix and adds frustration.
When you remove the moles, you stop the new tunneling. The lawn can recover, roots can reestablish, and you are not loading the property with extra chemicals that do not touch the actual problem. That is true for a small backyard in Cincinnati, a sports field in Dayton, or a commercial site in Northern Kentucky.
If you are trying to get rid of moles in your yard or on a larger property, the path is clear. Shift your focus from fighting grubs to removing the animal that is doing the digging. Humane, mechanical trapping from a skilled local team gives you a direct, proven way to protect your turf and get ahead of the next wave of tunnels.
To stop mole damage and get a free estimate for professional trapping service, call Trap Your Moles today at (513) 518-5639.
If you are tired of tunnels, mounds, and ruined landscaping, we are ready to help you get rid of moles in your yard quickly and safely. At Trap Your Moles™, we use proven trapping methods that protect your lawn and your peace of mind. Reach out today and let us assess your property, explain your options, and create a plan that fits your yard and budget. If you are ready to schedule or have questions, simply contact us and we will follow up promptly.
Moles on one lawn are annoying. Moles across ten lawns, an office park, or a sports complex turn into a real headache. Tunnels pop up overnight, residents complain, fields are unsafe, and you keep throwing money at castor oil, sonic spikes, poison peanuts, and odd gadgets that promise a lot and fix nothing.
When you manage more than one property, mole problems spread fast. One untreated lot can send new moles into every yard, fairway, or common area around it. If each site is handled differently, or not handled at all, you never catch up. You just feel like you are playing whack-a-mole with your time and budget.
We focus on giving multi-site managers a better option. A coordinated, professional mole control service that is built for scale, uses humane mechanical trapping only, and comes with a guarantee. Our goal is simple: help you get consistent control, protect your budget, and keep every property looking clean, without you babysitting contractors or guessing what to do next.
Most property managers we meet have already tried the usual DIY fixes. On paper they sound easy. In real life they rarely work, especially on large or multiple sites.
Common DIY tools that let you down include:
Here is why those options usually fail when you manage HOAs, golf courses, athletic fields, office parks, or city sites.
DIY also breaks down because of fragmentation. Each property might try something different. One board member buys spikes. Another crew uses poison peanuts. Another site does nothing. The result is a revolving door of:
The larger your footprint, the faster those failed experiments burn cash and time. Labor hours, products that do not work, damaged turf, and the hit to your reputation all stack up. Trapping is the only proven mole control method that actually removes the animals and breaks the cycle.
Professional mole control means you stop trying to scare moles away and start removing them from your properties. We do that with humane mechanical traps only. No poisons and no toxic chemicals, ever. That protects children, pets, sports fields, and groundwater, and it keeps you away from chemical headache and extra rules.
A typical service across your sites looks like this:
Eastern ground moles are active all year. They do not hibernate. That means “once a year” or “set it and forget it” plans do not work. We build service around what the moles actually do, not what the calendar says. When we see fresh activity, we are back to knock it down quickly.
As an A+ BBB-accredited, licensed, insured, and bonded wildlife control company, we also understand that your world runs on documentation and predictability. You need:
We guarantee our work. If mole activity returns during the service period, we return at no additional cost. That helps stabilize your budget and reduces surprise expenses for boards, owners, or supervisors.
The real power for property managers is having one plan, one system, and one team for every site. A single provider for mole control service means:
We group nearby locations into efficient routes. That might be several HOA entrances along the same road, a cluster of outlots around a retail center, or school fields in the same district. Grouping sites this way lets us respond quickly and keep a regular check on activity.
Timing also matters. Many managers like to have services ramped up before irrigation schedules, big events, or sports seasons, so fields and lawns are in good shape when they are used the most. Continued trapping through fall and winter is just as important. Since eastern ground moles never really take a season off, steady control in the colder months helps prevent a big blowup of new tunnels in spring.
Operationally, a coordinated plan means:
Instead of reacting to every new mound, you move to a simple, steady program.
Mole activity is not just a cosmetic issue. It hits real parts of your operation.
Tunnels and mounds lead to:
When you run an HOA, golf course, park, school, or business campus, the grounds are part of your reputation. Smooth, clean turf tells people you take care of the place. Long ridges, soft spots, and fresh mounds say the opposite.
A consistent trapping program across all properties turns mole control from a random emergency into a planned line item. Instead of guessing what you will spend on surprise repairs after the next tunnel, you have a steady, known approach to keeping moles in check.
There is also a growing interest in safety and environmental care. A poison-free, humane trapping service is easier to stand behind when you talk with:
You can point to a real process that protects both turf and people.
DIY and scattered mole efforts do not work at scale. Eastern ground moles stay active all year, across all your lawns and fields. Repellents, spikes, and poisons eat up time and money while tunnels keep spreading. Mechanical trapping is the only proven answer that actually removes the moles causing the damage.
We focus on taking this headache off your plate. From inspection to trapping to ongoing checks across Cincinnati, Dayton, Springfield, and Northern Kentucky, we build a coordinated mole control service for every property you manage. With one plan and one team, you can finally get ahead of the problem and keep your turf, your budget, and your reputation in good shape.
Call (513) 518-5639 today for a free estimate and a coordinated mole control plan for every property you manage.
If you are tired of new mole tunnels appearing every week, our experienced team is ready to help restore your yard and prevent further damage. Start by exploring our targeted mole control service to see how we locate and remove moles quickly and effectively. At Trap Your Moles™, we use proven methods tailored to your property so you can feel confident your lawn is in good hands. Have questions or want to schedule an appointment now? Simply contact us and we will walk you through your next steps.